Managing graphs in GraphOS Studio
This article describes GraphOS Studio features for all graph types. For features specific to supergraphs, see also Supergraph-specific Studio features.
Creating graphs
To create a cloud supergraph, see the GraphOS quickstart.
To create a non-cloud graph (i.e., a self-hosted supergraph or a monograph), see this section.
Viewing graph details
After selecting an organization in GraphOS Studio, click on a particular graph variant to view its README, schema, data, and settings. All of a Studio organization's members can access the data and settings for every graph that belongs to that organization.
Enterprise accounts can set member roles to configure fine-grained access for individual members of their organization.
The README page
When a user opens one of your graph's variants in GraphOS Studio, its README page is shown:

Like the typical homepage for a Git repository, this page displays a Markdown-based README that you can edit with any content you like.
Note: Only organization members with the Org Admin, Graph Admin, Contributor, or Documenter role can edit a variant's README. If a variant is protected, Contributors cannot edit its README.
Each variant has its own README. If you edit one variant's README, those edits are not applied to other variants. Among other uses, this enables you to provide different information to external consumers in a public variant.
Supported Markdown
The README supports all basic Markdown syntax and most extended syntax (including tables, code blocks, and footnotes).
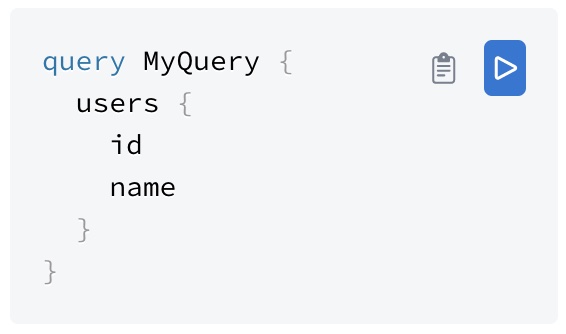
You can define a GraphQL code block with the following syntax:
```graphqlquery MyQuery {users {idname}}```
This renders the code block with buttons you can use to copy an operation or open it in the Explorer:
README shortcodes
The README supports a set of shortcodes you can use to populate it with data that's specific to your variant, such as the graph's name and the variant's graph ref:
# Overview of {{ graph.name }}Graph ref: {{ graph.ref }}
For a list of all supported shortcodes, click Graph shortcodes in the bottom-left corner of the README editor.
Exploring your schema
GraphOS Studio provides helpful views for exploring your registered schema:
- The Explorer, which helps you build new operations against your graph
- The Schema page, which enables you to filter your schema's type and field definitions (and also view your schema's raw SDL)
The Explorer
GraphOS Studio provides a powerful Explorer IDE that helps you visualize your graph and run queries against it. It's available from your graph's Explorer tab in Studio.
The Schema page
The Schema page lists the different kinds of definitions in your schema (objects, scalars, etc.):
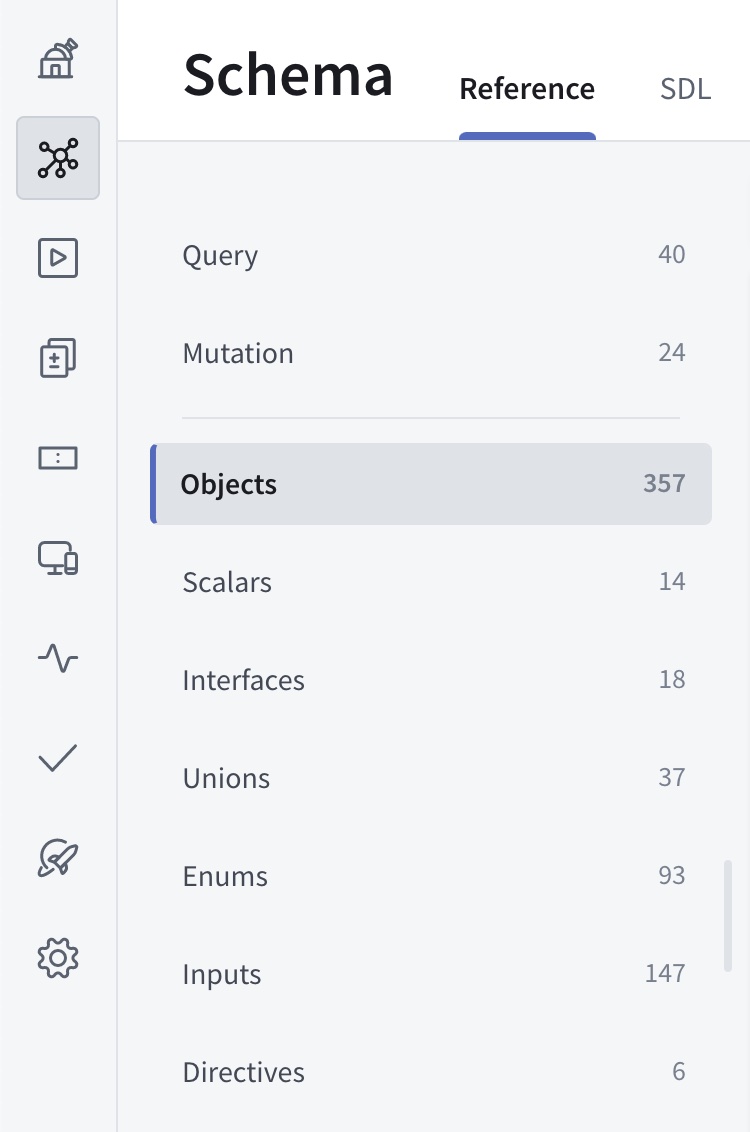
Select a kind of definition to view a table of all corresponding types:
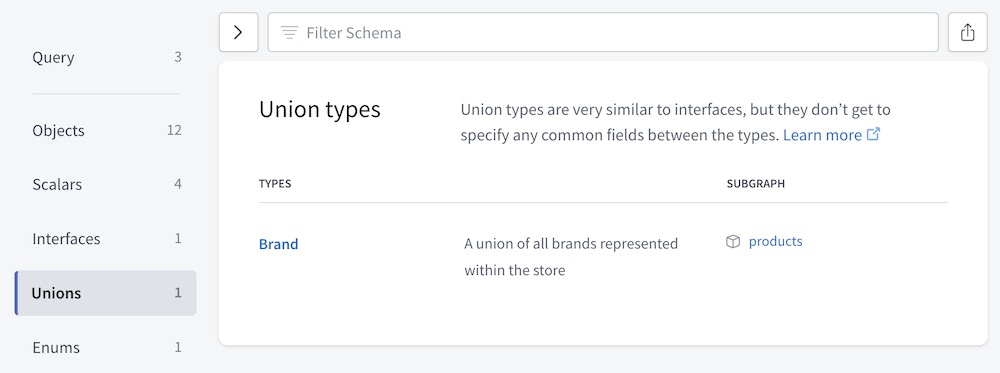
Each type definition in the table includes:
- The type's name
- You can click the name to view additional details for the type (such as fields for an object, or possible types for a union).
- The type's description (if your schema includes one)
- Which subgraphs define the type (if you have a federated supergraph)
- Users with the Consumer role can't view subgraph details.
Filtering your schema
The top of the Schema page provides a Filter Schema box you can use to find types and fields that match a set of filters:
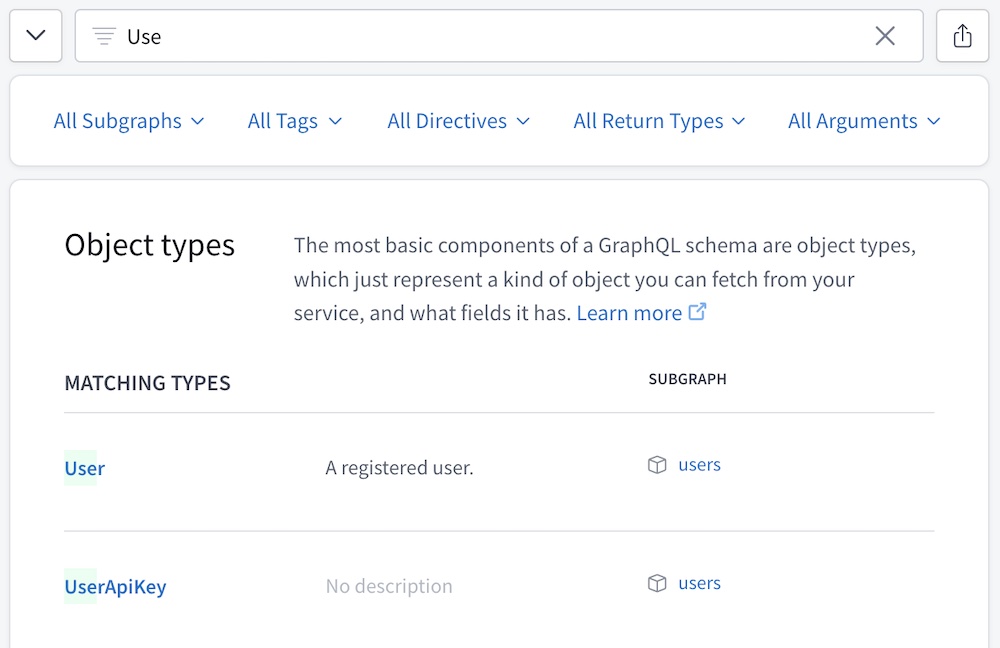
- Click the arrow button to the left of the filter box to show/hide the filter selection dropdowns.
- Click the button to the right of the filter box to copy a shareable URL for your currently active set of filters (you can also copy your browser's address bar directly).
Any filters you set remain active as you move between definitions on the Schema page.
You can filter your schema definitions by type/field name (as shown above), along with any combination of the following:
| Filter | Description | Example |
|---|---|---|
| Include results defined in any of the specified subgraphs. Valid only for federated supergraphs. |
|
| If your graph uses the If your graph doesn't use the |
|
| Include results that have any of the specified directives applied. If viewing a table of objects, also include objects with at least one field that has a specified directive. |
|
| Include results with any of the specified return types. If viewing a table of objects, include objects with at least one field that has a specified return type. This filter includes all fields that return a particular type, regardless of each field's nullability or whether it returns a list. For example, if you specify |
|
| Include results that take a GraphQL argument with any of the the specified names. If viewing a table of objects, include objects with at least one field that takes a specified argument. |
|
Filtering rules
- If you list multiple possible values in a single filter, those values use "OR" logic.
- For example, if you filter by
subgraph:products,reviewsthe result includes definitions from each subgraph.
- For example, if you filter by
- If you apply multiple types of filters, those filters use "AND" logic.
- For example, if you filter by
subgraph:productsandreturnType:Int, the result includes only definitions that fulfill both criteria.
- For example, if you filter by
- Currently, it isn't possible to use "AND" logic for multiple filters of the same type.
- For example, it isn't possible to filter by
subgraph:products"AND"subgraph:reviewsto include only definitions that are present in both subgraphs.
- For example, it isn't possible to filter by
Tracking schema changes
The Changelog page in Studio displays a timeline of changes made to your graph's schema:
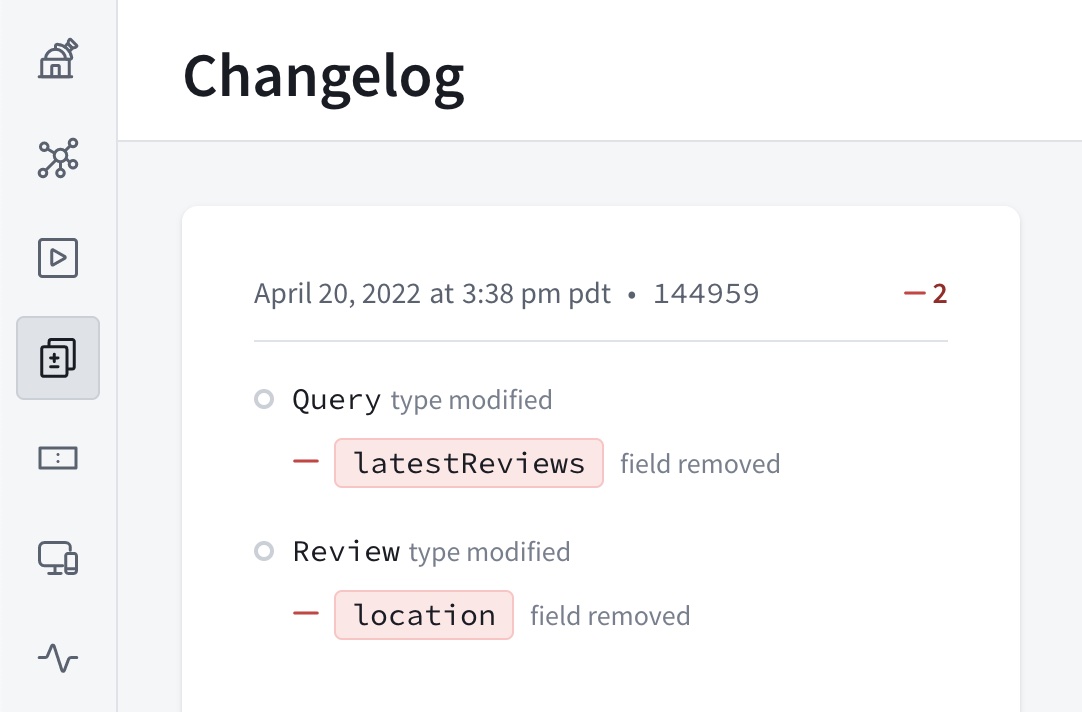
Only schema changes that you publish to Studio are included in this timeline, which is one of the most important reasons to include schema publishing in your continuous delivery pipeline.
Managing access permissions
Public variants
You can enable public access for individual variants of your graph. If you do, anyone with that variant's public link can view the following pages for that variant in Studio:
- Home
- This shows the variant's README.
- Schema
- Explorer
- You can also embed the Explorer on your own webpage.
This enables consumers of your graph to learn about your graph's schema and any special usage information (such as authentication details) that you've documented in the public variant's README. They can also run properly authenticated operations against your graph with the Explorer.
People outside your organization can't view any other pages for a public variant (Fields, Operations, etc.), and they can never view any pages for private variants. New variants always start as private.
Making a variant public
Only organization members with the Org Admin or Graph Admin role can toggle a variant's public visibility.
Go to your variant's Settings page and open the This Variant tab.
Find the Public card and click Change:
Toggle your selection and click Save.
You can toggle the switch back to Off to make the variant private again.
After you make a variant public, you can click the variant's PUBLIC label at the top of GraphOS Studio to get its public link:

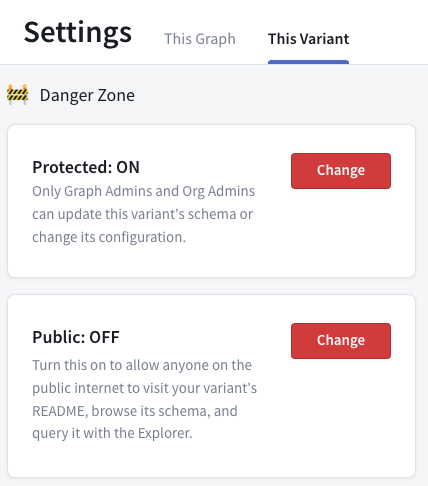
Protected variants (Enterprise only)
If you have a GraphOS Enterprise plan, you can designate particular variants of a graph as protected variants. A protected variant limits the capabilities of users with the Contributor role to make certain changes to the variant:
- Contributors cannot push schema updates to a protected variant.
- Contributors cannot manage Explorer-related settings for a protected variant, such as setting the variant's endpoint URL.
- Graph API Keys with the Contributor role cannot report usage metrics for a protected variant.
Graph Admins and Org Admins can configure whether a variant is protected from the This Variant tab of the variant's Settings page.
Internal graph visibility (Enterprise only)
For external graph visibility, see Public variants.
By default, graphs are visible to all members of your organization. If you have a GraphOS Enterprise plan, you can set a graph to instead be visible only to members you invite.
You can configure visibility and grant your organization's members explicit access to your graph from the Permissions tab of your graph's Settings page.
Note that Org Admins can always see all graphs in your organization.
Dangerous actions
Transferring graph ownership
You can transfer a graph to a different GraphOS organization you belong to by visiting the graph's Settings page in Studio and changing the graph owner.
Deleting a graph
⚠️ Deleting a graph cannot be undone!
If you delete a cloud supergraph, all of its GraphOS-hosted routers are deprovisioned.
You can delete a graph from Studio by visiting its Settings page and clicking Delete Graph.