Set up a self-hosted supergraph
Host your supergraph in your own infrastructure
This tutorial gets you up and running with GraphOS and a self-hosted supergraph, using the Apollo Router. While you can run the router regardless of your Apollo plan, connecting the router to GraphOS requires an Enterprise plan. If your organization doesn't currently have an Enterprise plan, you can test out this functionality by signing up for a free Enterprise trial.
ⓘ NOTE
This tutorial uses Docker for containerization of your supergraph's router.
Supergraph concepts
Before we get started, let's quickly cover what a self-hosted supergraph is.
A supergraph combines multiple GraphQL APIs into a single unified GraphQL service. The individual APIs in a supergraph are called subgraphs:
A separate service called the router sits in front of your subgraphs and provides the publicly accessible endpoint for your supergraph. Clients query the router, which distributes each query across the appropriate combination of subgraphs and returns the combined result.
The router uses a special GraphQL schema called the supergraph schema. This schema incorporates the types and fields in each subgraph schema, along with metadata that enables the router to correctly distribute queries across subgraphs.
A self-hosted supergraph is a supergraph with a router that you host and manage in your own infrastructure. This is in contrast to a cloud supergraph, which uses a router that's hosted and managed by Apollo.
We'll cover these concepts in more detail as we proceed through the steps below.
1. Set up Apollo tools
This quickstart uses the following Apollo tools:
- GraphOS Studio. This is the primary web interface for GraphOS. Studio helps you monitor, manage, and collaborate on your supergraph.
- The Rover CLI. This is the primary command-line interface for GraphOS. Rover helps you interact with your graphs and their schemas.
Let's set these up first.
Create an Apollo account
To manage our supergraph with GraphOS, we need an Apollo account. Let's create one if you don't have one yet.
Complete the first step of Get started with GraphOS (Create your Apollo account), then return here.
Create a graph in GraphOS Studio
After you create your Apollo account, create your first graph in GraphOS Studio by following these steps:
Go to your organization's Graphs tab in GraphOS Studio.
Click Create New Graph in the top right. Studio displays the following dialog:
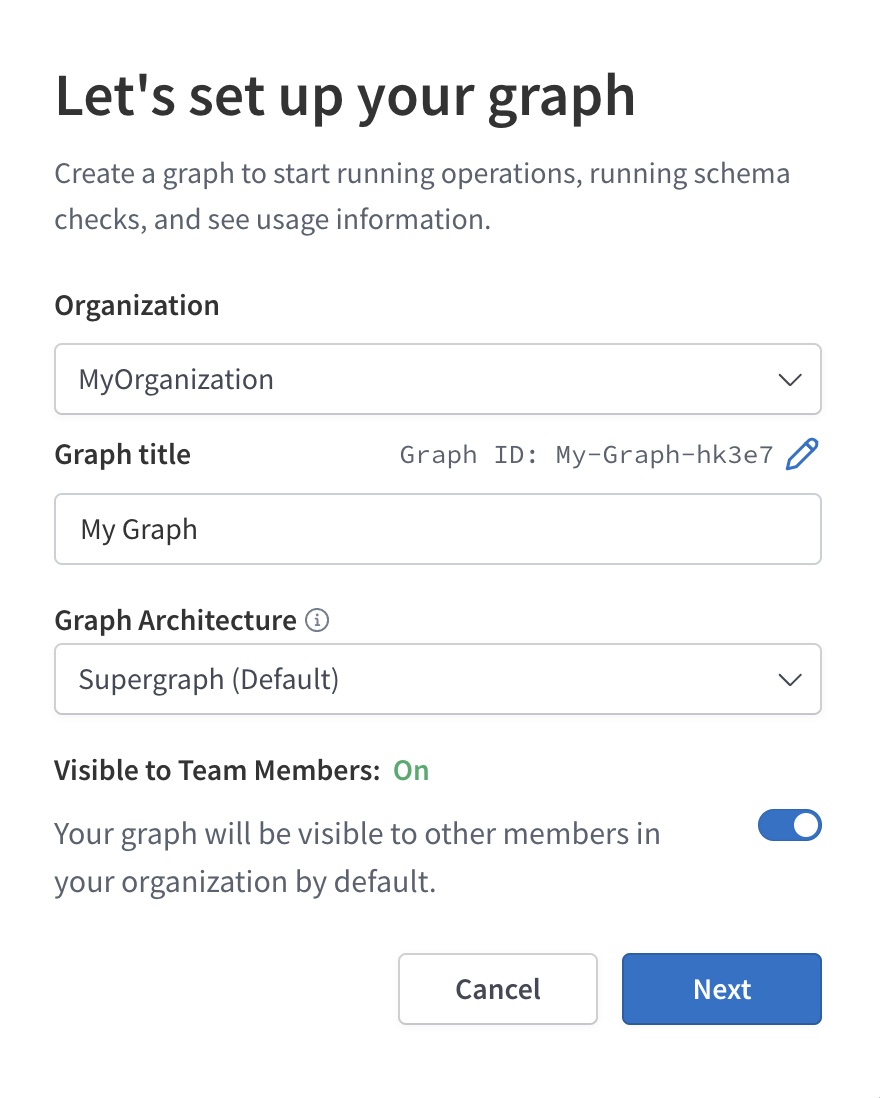
Specify an Organization and Graph title for your graph.
Leave the Graph Architecture as Supergraph (Default).
Click Next. A modal like the following appears:
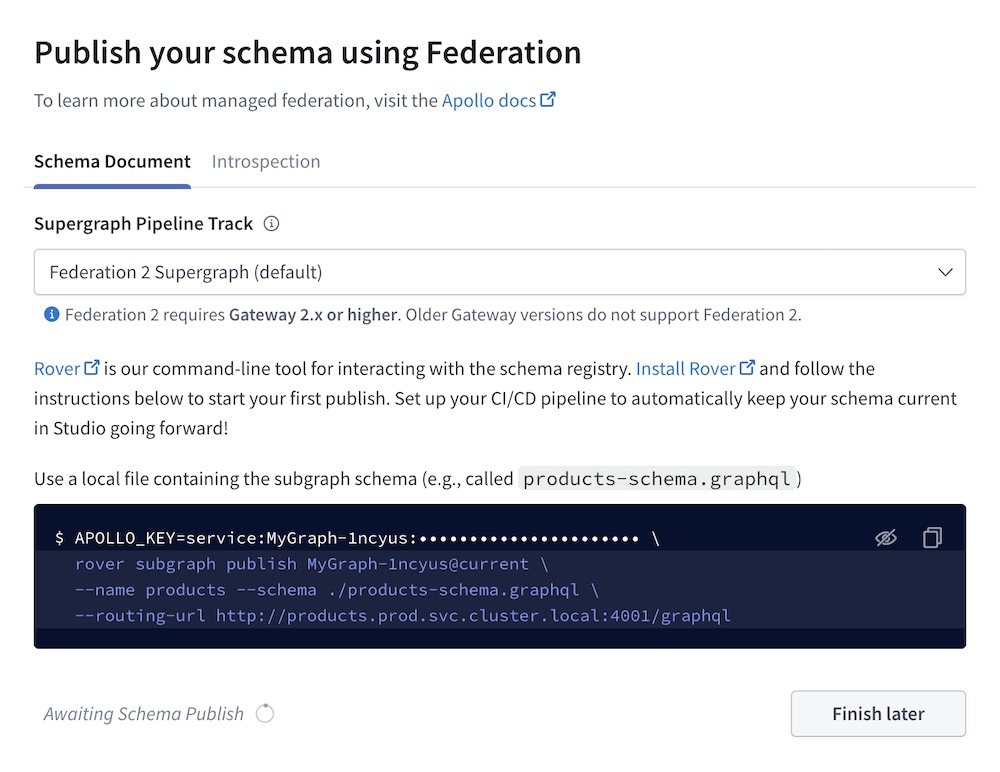
- Leave the Supergraph Pipeline Track dropdown set to its default value.
Your graph has been created!
Install the Rover CLI
Rover is Apollo's CLI for managing all kinds of graphs, including subgraphs and supergraphs. We'll use it throughout this quickstart.
ⓘ NOTE
Even if you already have Rover installed, you should update your version now by completing this step.
Install the latest Rover release with the appropriate command for your system:
curl -sSL https://rover.apollo.dev/nix/latest | sh
iwr 'https://rover.apollo.dev/win/latest' | iex
After installing, run rover in your terminal with no arguments to confirm that it installed successfully. Verify that the printed version number matches the latest full release (if it doesn't, you might need to manually delete a previous outdated installation).
Authenticate Rover with GraphOS
We'll use Rover to publish our subgraph schemas to GraphOS. To do that, we first need to authenticate Rover with GraphOS.
Complete the first two steps of Configuring Rover (Obtain an API key and Provide the API key to Rover), then return here.
2. Clone the router project template
For this quickstart, we'll use some Apollo-hosted example services as our subgraphs, and we'll set up the Apollo Router in front of them. The Apollo Router is a high-performance, precompiled Rust executable that acts as the router for a supergraph.
First, let's create a project directory for your router:
- Open this GitHub template. It provides out-of-the box configuration for deploying and running the Apollo Router via a Dockerfile.
- On the template page, click Use this template > Create a new repository to copy the template into a new repository in your GitHub account.
- If you don't use GitHub, you can instead clone the template directly via the Code menu.
- Clone your new repository to your local machine.
3. Start the router with Docker
To run the Apollo Router locally, you need a way to build and run containers. Here are some popular options:
ⓘ NOTE
This tutorial uses the docker command. Alternative commands usually look similar.
Try building and running your router container:
docker build -t router .docker run -it -p4000:4000 router
When you do, you'll get a startup error message like the following:
That's because we aren't currently providing a supergraph schema to the router! We'll fix that soon.
4. Obtain your subgraph schemas
This quickstart uses two Apollo-hosted subgraphs (named locations and reviews) from an imaginary space tourism application called FlyBy. Here are their URLs and schemas for reference:
If you have your own existing subgraphs that you want to use instead of these examples, feel free! Provide their names and URLs wherever you see the example subgraphs used in the steps below.
To compose a supergraph schema for our router, GraphOS needs the following information about each of our subgraphs:
- The subgraph's schema
- The URL of the subgraph's GraphQL endpoint (which must be accessible by the router)
Fortunately, we have all of this information! Let's send it to GraphOS.
5. Publish your subgraph schemas
Because we've already configured the Rover CLI, we can now use its subgraph publish command to publish our subgraph schemas to GraphOS.
In GraphOS Studio, click the graph you created back in the first step. Because we haven't published any schemas to it yet, the following dialog appears:
To publish our subgraph schema, we'll first use Rover to introspect the running subgraph, then pass the obtained schema to subgraph publish.
Paste the following multi-line command into your terminal, but don't run it—you need to modify it first.
rover subgraph introspect https://flyby-locations-sub.herokuapp.com/ | \rover subgraph publish --name locations \--routing-url https://flyby-locations-sub.herokuapp.com/ \--schema - <GRAPH_REF>In your terminal, replace the final value
<GRAPH_REF>with the appropriate value for your graph. In the screenshot above, this value isMyGraph-1ncyus@current, but your value will be different.Run the modified command.
If the command is successful, you'll see output like the following:
A new subgraph called 'locations' was created in 'docs-example-graph@main'The supergraph schema for 'docs-example-graph@main' was updated, composed from the updated 'locations' subgraphIf the command fails, make sure you've authenticated Rover with GraphOS. All Rover commands that interact with GraphOS require a valid API key.
If you open your graph's details in Studio now, you'll see types and fields from the
locationssubgraph listed on the Schema page: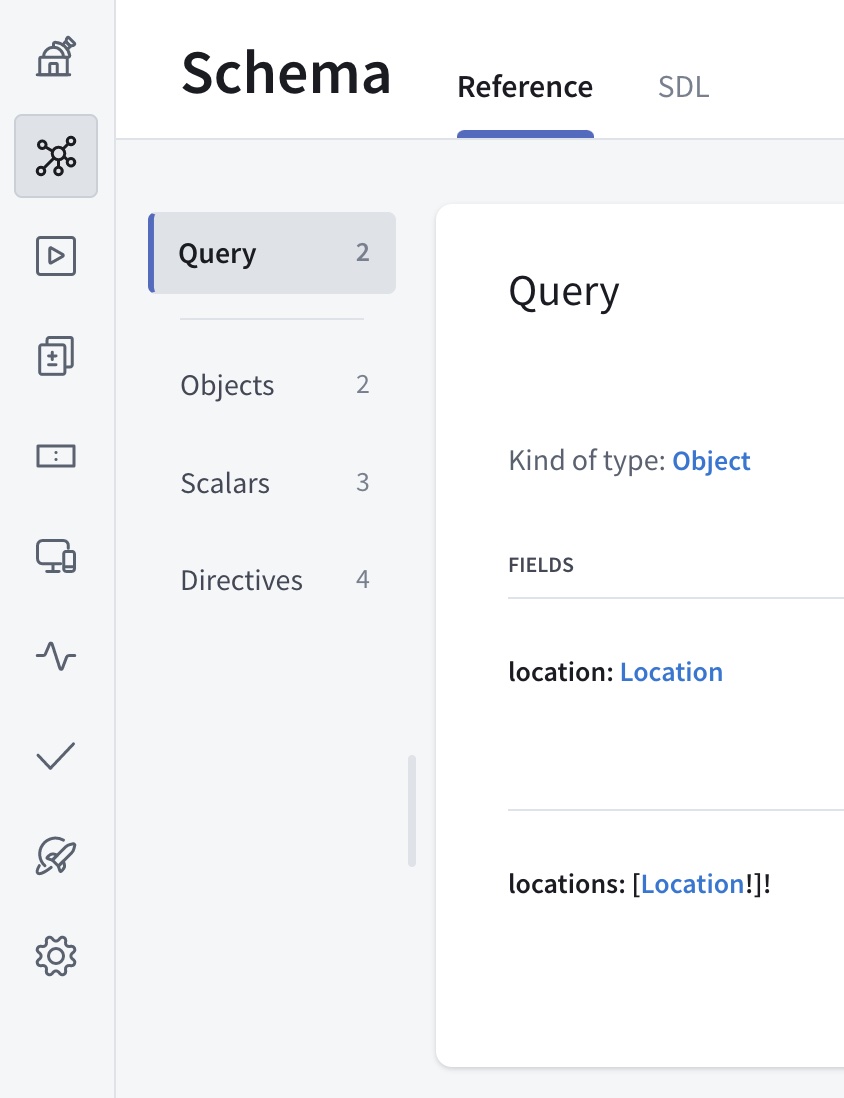
Do the same thing for the
reviewssubgraph, again substituting your graph ref:rover subgraph introspect https://flyby-reviews-sub.herokuapp.com/ | \rover subgraph publish --name reviews \--routing-url https://flyby-reviews-sub.herokuapp.com/ \--schema - <GRAPH_REF>You only need to provide a subgraph's
--routing-urlthe first time you publish that subgraph's schema to a particular variant (unless you need to change that URL later).If you refresh the Schema page in Studio, you'll now see types and fields from the
reviewssubgraph as well.

Every time we publish a subgraph schema, GraphOS automatically composes all of our subgraph schemas into a supergraph schema! However, our router isn't yet fetching that schema from Apollo. We'll tackle that next.
6. Connect the router to GraphOS
It's time to enable our router to fetch its supergraph schema from GraphOS. To do that, we need a graph API key that we set as the value of an environment variable.
💡 TIP
We recommend that you create a separate API key for each system that communicates with GraphOS. This reduces the impact whenever you need to replace an API key that might be compromised.
Obtain a graph API key for your Studio graph by following these steps:
If you have an Enterprise plan, set the API key's role according to the following:
- If your router will use a protected variant, choose Graph Admin.
- Otherwise, choose Contributor.
💡 TIP
Make sure to copy and paste the API key's value somewhere so you can reference it. For security, API keys are not visible in Studio after creation.
Create a file called
.envin your Router project and paste in the following (replace<API_KEY>with your graph API key and<GRAPH_REF>with your graph ref):APOLLO_KEY=<API_KEY>APOLLO_GRAPH_REF=<GRAPH_REF>⚠️ CAUTION
API keys are secret credentials. Never share them outside your organization or commit them to version control. Delete and replace API keys that you believe are compromised. Make sure always to add
.envfiles to your.gitignorefile. The router template project already does this.Paste this command into your terminal and run it:
docker run -it --env-file .env -p4000:4000 routerThis time there's no error, and you'll see output similar to the following (timestamps omitted for brevity):
By providing an API key to the router, you also automatically enable operation metrics reporting to GraphOS, enabling you visualize your graph's performance. Learn more about metrics.
Now that our router is running, we can quickly open our browser to localhost:4000 to explore our composed schema in Apollo Sandbox:
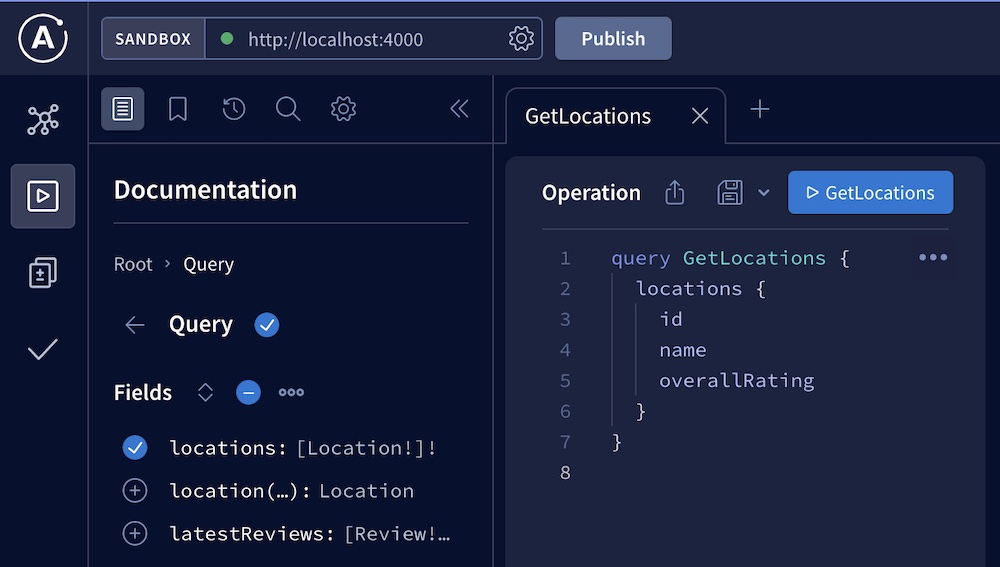
Let's execute some test queries against the supergraph. We'll look at metrics for those test queries in the next step.
7. View operation and field metrics
Because our router is connected to GraphOS, it automatically collects and reports metrics on incoming operations and their fields. You can then visualize those metrics in Studio.
Return to GraphOS Studio and go to your supergraph variant's Insights page, which looks like this:
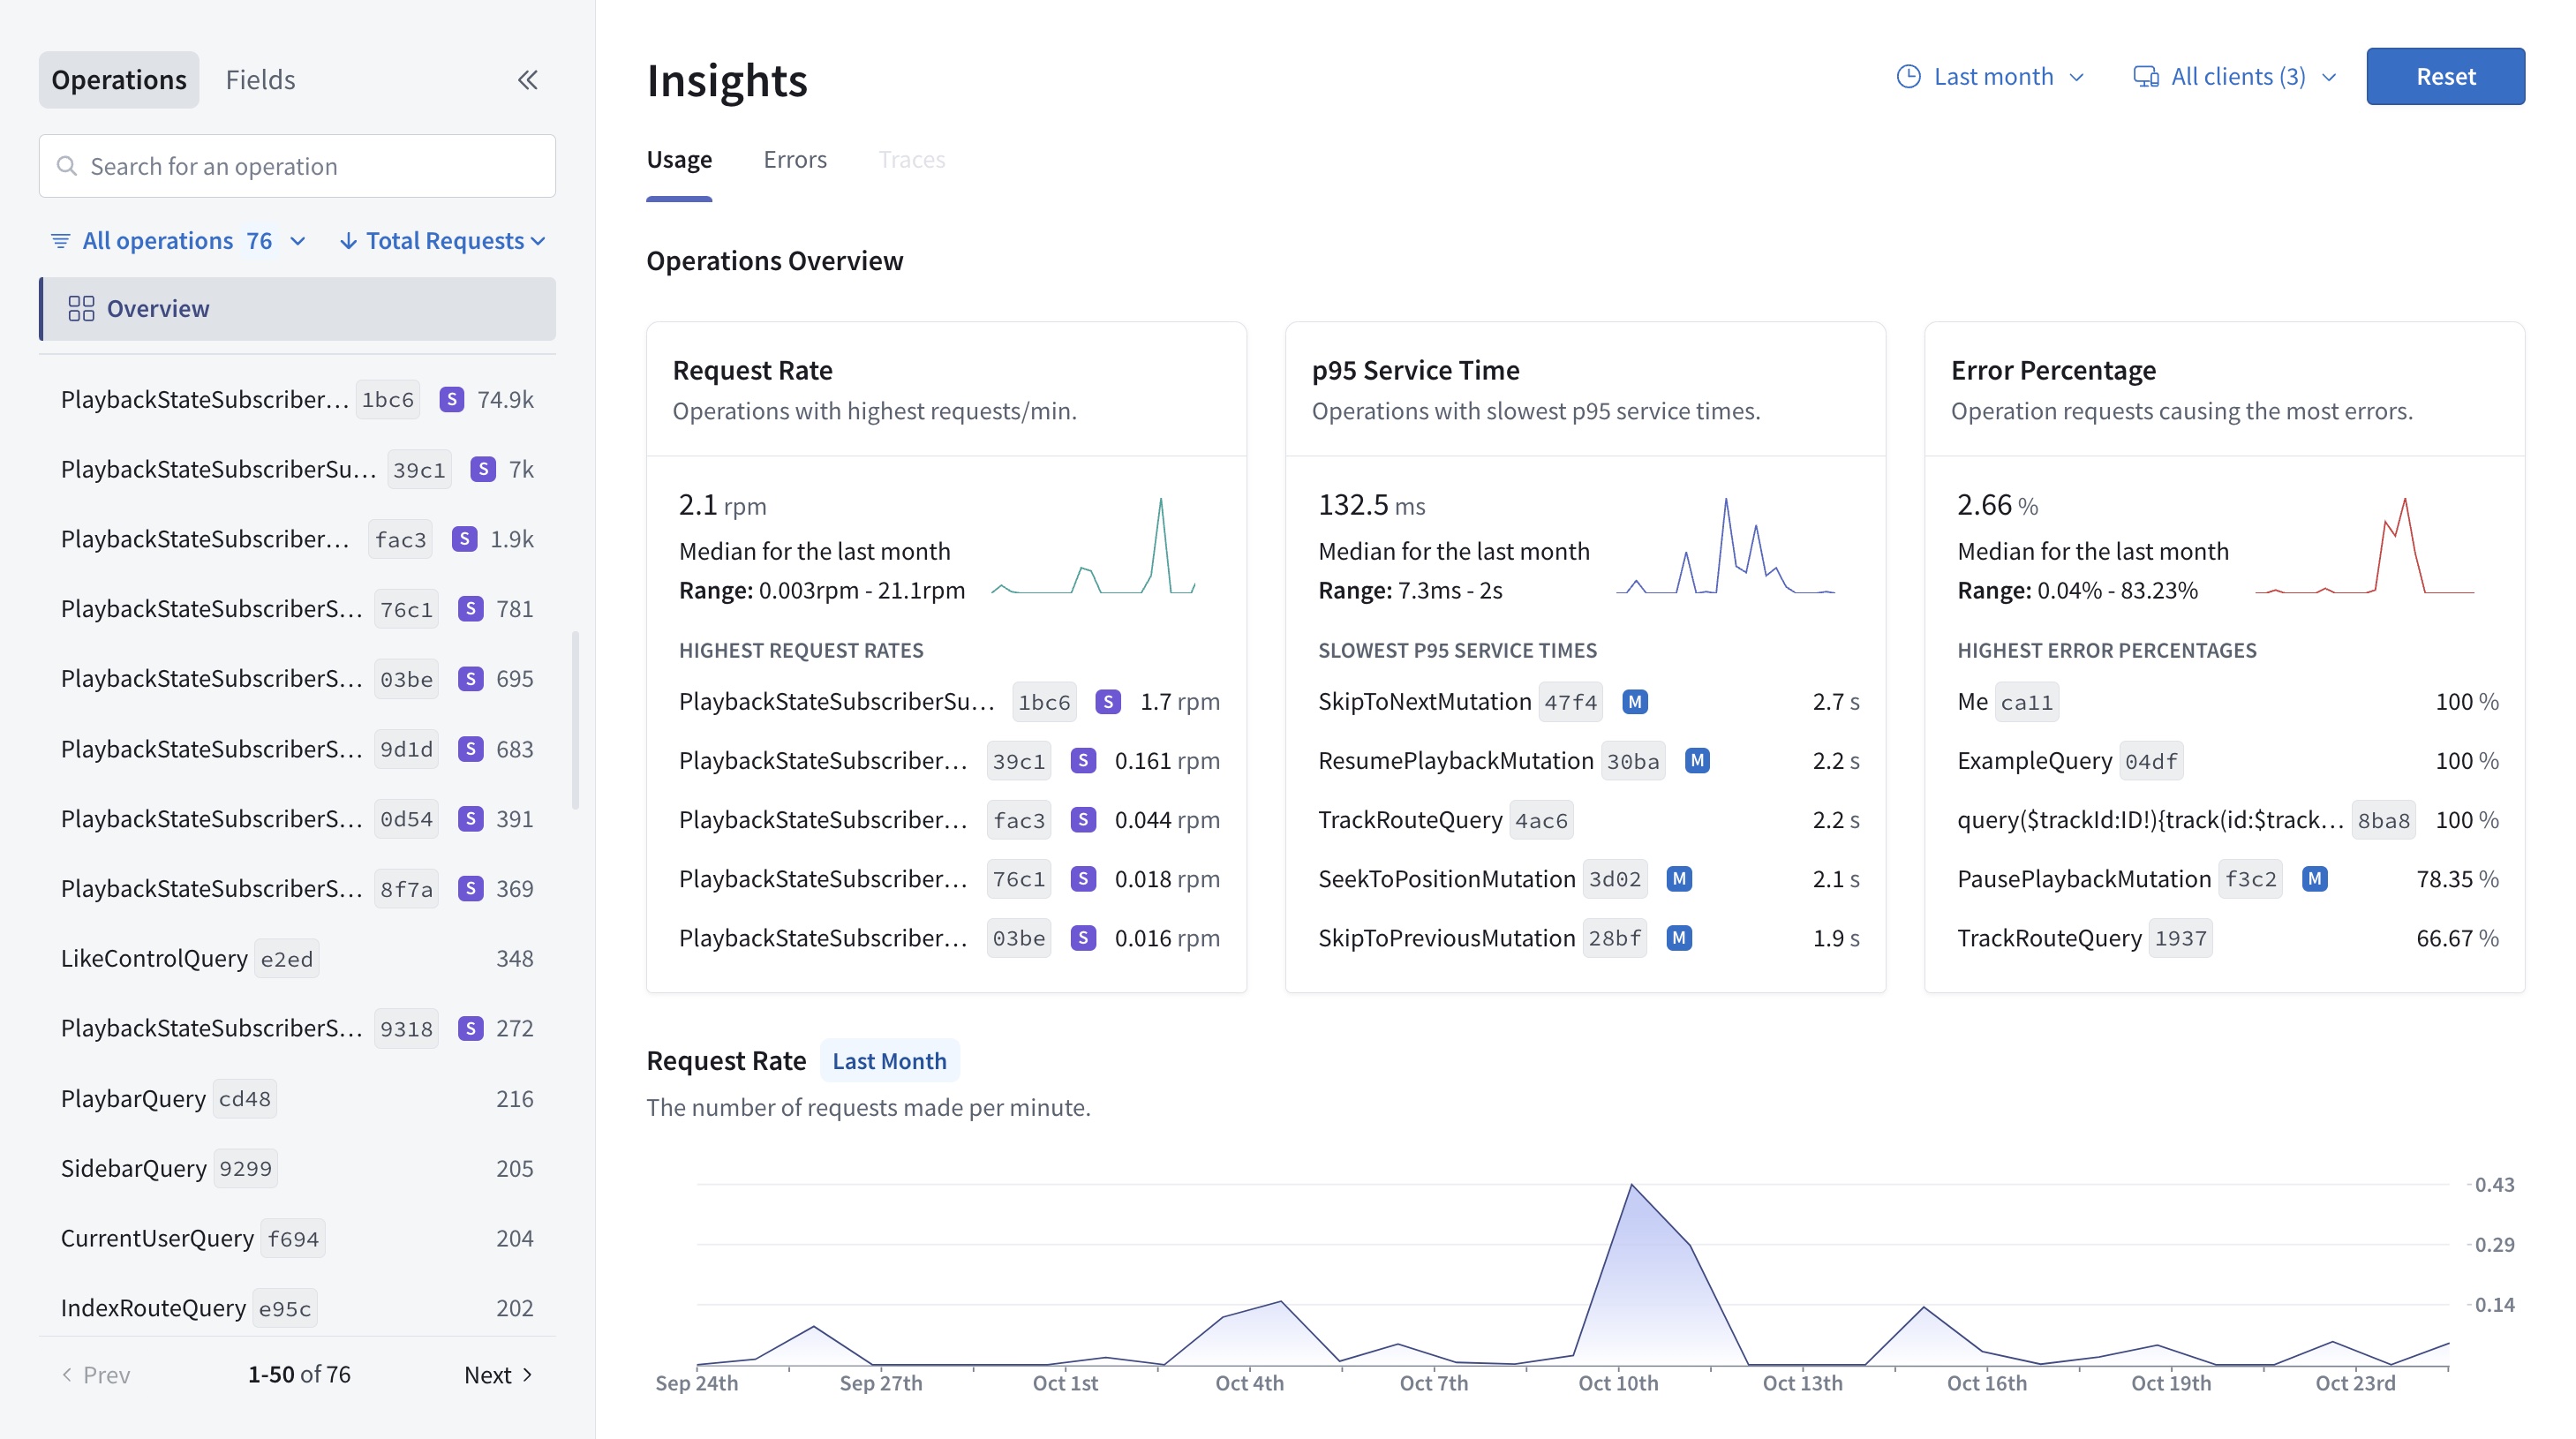
Within a few minutes, the test queries you executed in the previous step should be represented on this page. The Insights page is vital to monitoring your supergraph's performance across all of your clients that query the router.
Learn more about the available metrics in the metrics documentation.
8. Deploy your router and connect clients
Now that our router is running successfully in our development environment, we can deploy it to our preferred platform (AWS, Google Cloud, etc.) so clients can begin querying it!
The exact details for deploying the router depend on which platform you use, but these high-level steps hold true for most platforms:
Build the Docker image in CI and push it to a container registry (some providers let you skip this step).
Deploy the image to your preferred platform (there are additional resources for Kubernetes deployments).
Set the
APOLLO_KEYandAPOLLO_GRAPH_REFenvironment variables in the router's deployment environment, as we did locally in this step.- Keep in mind that
APOLLO_KEYis a secret, so use an appropriate mechanism for storing it in your deployment environment.
- Keep in mind that
If your platform expects the router to listen on a particular port, set this port in the
router.yamlfile included with the template:router.yamlsupergraph:# The socket address and port to listen onlisten: 127.0.0.1:4000# OR if the port is specified via environment variablelisten: 127.0.0.1:${env.PORT}💡 TIP
Learn more about router configuration options.
After you successfully deploy your router, it's ready to start receiving client operations! If you have any existing client applications that connect directly to your GraphQL API, you can update their GraphQL endpoint URL to your router's URL.
Similarly, any new client applications should use your router's URL.
ⓘ NOTE
- For browser-based clients, make sure their origin is allowed in your router's CORS rules, which you can set in the router's YAML configuration file.
- Only update clients that communicate with the correct instance of your GraphQL API! For example, if your API has staging and production instances, only update clients that communicate with the instance used by this supergraph variant.
Next steps
Nice work! We've registered two subgraph schemas with GraphOS, and we've set up a router that fetches its composed supergraph schema so it can execute operations across subgraphs.
If we now publish changes to one of our subgraph schemas, our running router automatically fetches the corresponding changes to the supergraph schema (assuming composition succeeds).
Next, we'll cover some of the most common and important actions to perform on your new supergraph, including:
- Updating subgraph schemas
- Adding another subgraph
- Setting up schema checks