Embedding the Explorer
You can embed the GraphOS Studio Explorer in a webpage that you can then provide to your graph's consumers. This enables those consumers to test out operations from your own website.
For example, here's an embedded Explorer for an Apollo example graph. Try it out!
Embedding on the Apollo Server landing page
In Apollo Server v3.8.0 and later, you can use a built-in plugin to embed the Explorer directly on your server's landing page.
You use the ApolloServerPluginLandingPageLocalDefault plugin to configure the landing page in your local development environment, and you use ApolloServerPluginLandingPageProductionDefault for production environments:
import {ApolloServerPluginLandingPageLocalDefault,ApolloServerPluginLandingPageProductionDefault} from '@apollo/server/plugin/landingPage/default';let plugins = [];if (process.env.NODE_ENV === 'production') {plugins = [ApolloServerPluginLandingPageProductionDefault({ embed: true, graphRef: 'myGraph@prod' })]} else {plugins = [ApolloServerPluginLandingPageLocalDefault({ embed: true })]}const server = new ApolloServer({typeDefs,resolvers,plugins});
For more information, see the landing page plugin API reference.
Embedding on an arbitrary webpage
Open GraphOS Studio and select the graph variant you want to use with the embedded Explorer.
Go to the variant's Explorer page.
Under the Explorer's Settings tab, find Embed Explorer and click Copy code snippet.
The following dialog appears:
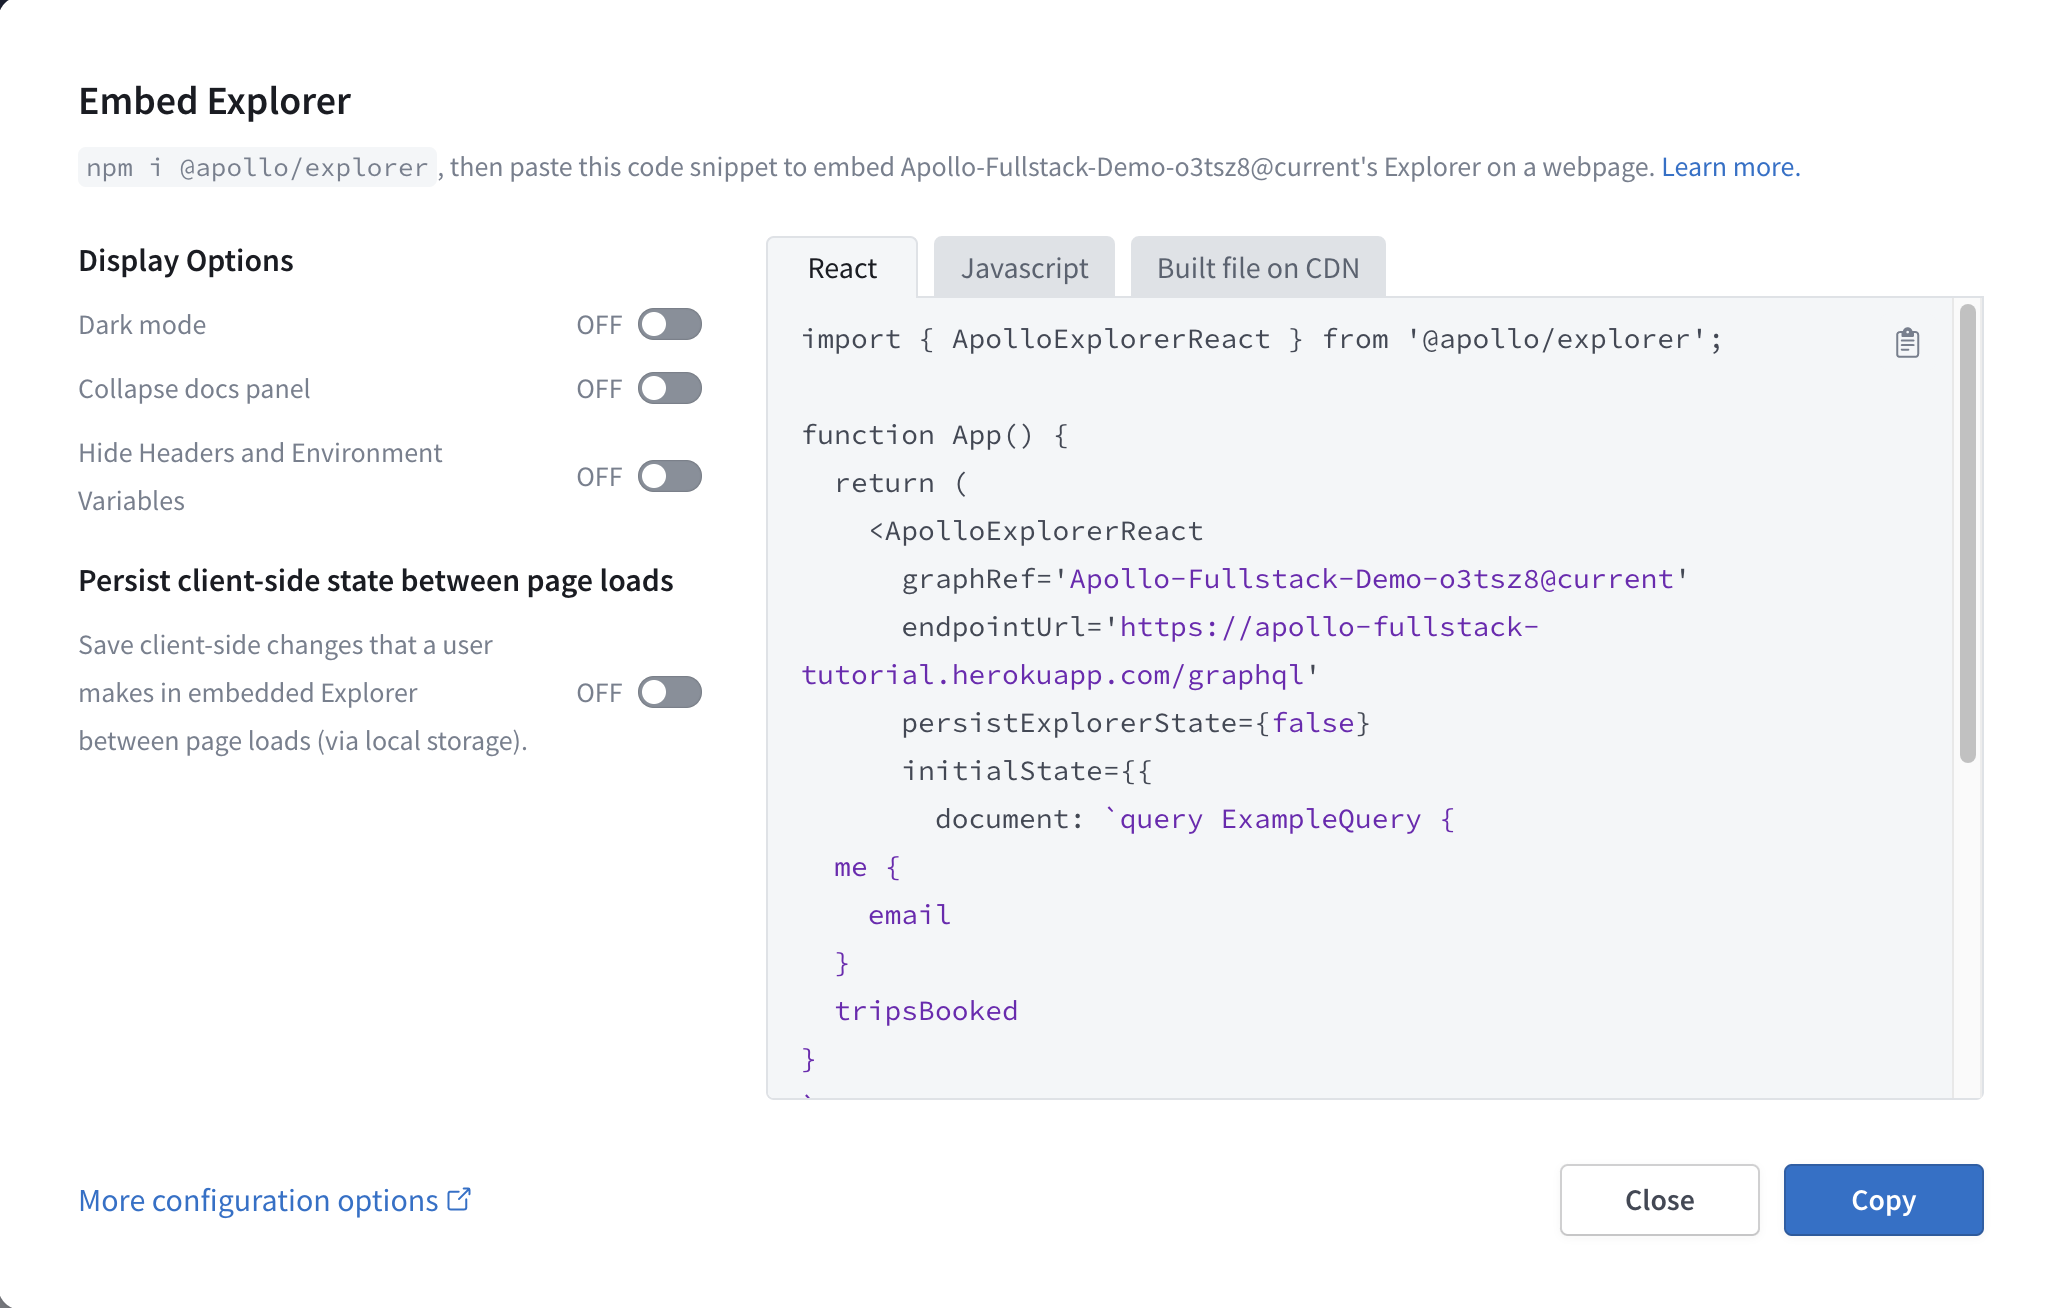
Use the options on the left side of the dialog to customize the embedded Explorer's appearance and behavior to your liking.
Still in the dialog, use the tabs above the code snippet to select the snippet for your use case:
- Use React for React apps where you can
npm installthe@apollo/explorerpackage. You will need to install the optional dependencyuse-deep-compare-effectto use the React package. - Use JavaScript for non-React JavaScript apps where you can
npm installthe@apollo/explorerpackage. - Use Built file on CDN to use Apollo's CDN-hosted embedded Explorer.
- Use React for React apps where you can
Click Copy to copy the snippet, then paste it into your code.
For descriptions of options shown in the dialog (along with advanced options that aren't shown), see below.
Setting a default operation
You can prepopulate your embedded Explorer with an operation from one of your existing Explorer tabs. If you do, the embedded Explorer includes all of the following automatically on load:
- The operation you selected
- Any variable names and values defined in the operation's associated tab that are used by the operation
- All header names and values defined in the operation's associated tab
To prepopulate a default operation, use one of the following methods:
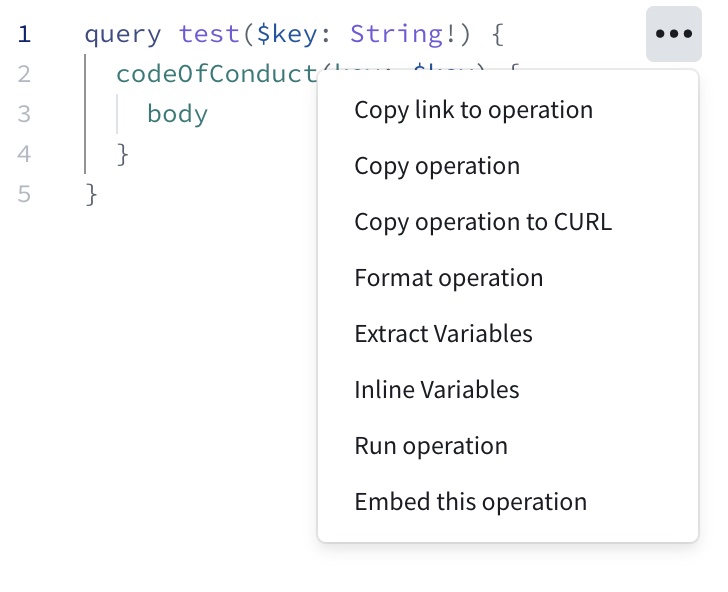
Option 1
Open the ••• menu next to an operation and click Embed this operation:
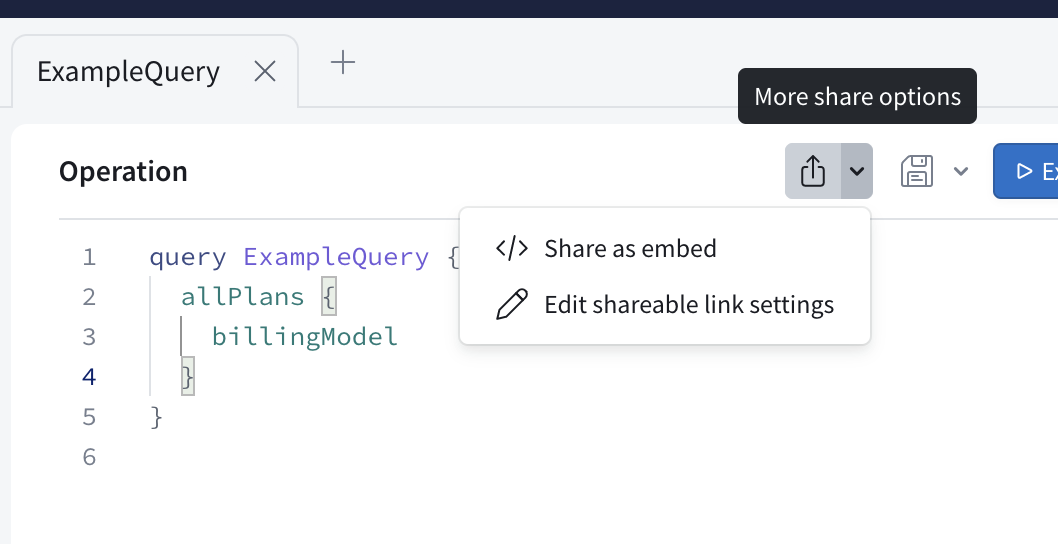
Option 2
Open the share dropdown in the Explorer and select Share as embed:
Authorization
If you're embedding a public variant, anyone with access to the embedded Explorer can view your schema and make queries against your variant.
If you're embedding a private variant, the embedded Explorer first asks users to authenticate by signing in to Studio. Authenticated users are then asked to authorize their Studio account to be used on the embedding webpage:

After authorizing, users can access the embedded Explorer, which includes schema navigation and visible operation collections.
Options
The EmbeddedExplorer object takes an options object with the following structure (individual options are described below):
{graphRef: 'acephei@current',endpointUrl: 'https://acephei-gateway.herokuapp.com',persistExplorerState: false,initialState: {document: `query ExampleQuery {me {id}}`,variables: { 'Variable1': 'ExampleValue' },headers: { 'Header1': 'ExampleValue' },displayOptions: {showHeadersAndEnvVars: true,docsPanelState: 'open',theme: 'light',},},handleRequest: (endpointUrl, options) => {return fetch(endpointUrl, {...options,headers: {...options.headers,authorization: `token ${token}`},})},}
Top-level options
These are the top-level fields you can include in the options object you pass to new EmbeddedExplorer:
| Name / Type | Description |
|---|---|
| Required. The graph ref for the variant you want to use the embedded Explorer with. Has the format The Explorer fetches this variant's schema from GraphOS Studio to populate its Documentation panel and enable code completion. If you omit this option, the Explorer does still load, but it doesn't know which schema to fetch. This prevents the Explorer from providing critical features like documentation and code completion. |
| The endpoint URL of the variant you want to use the embedded Explorer with. This value is automatically populated in the Explorer's embed snippet. Required, unless you specify your own fetcher with the |
| If the graph you are embedding is a private variant, we will by default only allow folks in your org to see the embedded Explorer. You can specify that you want anyone who visits your embedded Explorer to be automatically invited to your org with this config object. When you are grabbing the embed code from the Explorer settings in Studio, you have the option to select the role you want folks to be invited as, and the If the graph you are embedding belongs to an SSO organization, folks will be able to log in with their SSO account and are automatically invited as the role you specify in the Org Settings page in Studio. Passing this in the embed config for a graph that belongs to an SSO account will not change any behavior. New users to your organization will always be invited as the role you specify in the Org Settings page in Studio. |
| If If The default value is |
| By default, the embedded Explorer uses the You might want to do this if you need to include specific headers in every request made from your embedded Explorer. |
| By default, the embedded Explorer uses your variant's Include cookies setting, which you configure from the non-embedded Explorer in Studio. You can set If you pass the Read more about the This config option is deprecated in favor of configuring the Include cookies setting for your variant in the non-embedded Explorer. |
| An object containing additional options related to the state of the embedded Explorer on page load. For supported subfields, see |
initialState options
These are the fields you can include in the initialState option you pass to new EmbeddedExplorer:
| Name / Type | Description |
|---|---|
| A URI-encoded operation to populate in the embedded Explorer's editor on load. If you omit this option, the Explorer initially loads an example query based on your schema. If you use one of the sharing methods described in Setting a default operation, the generated code snippet automatically sets this option with the details of the operation you used. If Example:
|
| A URI-encoded, serialized object containing initial variable values to populate in the Explorer on load. If provided, these variables should apply to the initial query you provide for Example:
|
| A URI-encoded, serialized object containing initial HTTP header values to populate in the Explorer on load. Example:
|
| The ID of a collection, paired with an operation ID to populate in the Explorer on load. You can find these values in your Studio Explorer by clicking the ... menu next to an operation you want to embed and selecting View operation details. Example:
|
displayOptions options
These are the fields you can include in the initialState.displayOptions option you pass to new EmbeddedExplorer:
| Name / Type | Description |
|---|---|
| If The default value is |
| If The default value is |
| If The default value is |