Securely communicate with subgraphs on your AWS VPC
Configure AWS VPC Lattice to communicate with your Cloud Dedicated router
Cloud Dedicated is currently in invite-only preview. Don't hesitate to get in touch if you'd like to request access or have any questions or feedback.
Cloud Dedicated leverages AWS VPC Lattice to send traffic to your subgraphs running in an AWS VPC without exposing them to the internet. With Lattice, you can define services and share them with the Apollo AWS organization.
You can provision AWS VPC Lattice with the Apollo Terraform module. Refer to the module's README for more information.
ⓘ NOTE
- You can only use Lattice for subgraphs in the same AWS region as your cloud router. If you need to run subgraphs in different AWS regions or run your workloads in a region not yet supported by Cloud Dedicated, please let us know.
- Using AWS VPC Lattice incurs costs outside of your Cloud Dedicated spend. Refer to the Lattice pricing page to learn more.
Create and share an AWS VPC Lattice service
To allow Cloud Dedicated to send traffic to your private subgraphs, you must:
- Create one or more AWS VPC Lattice target groups.
- Create one or more AWS VPC Lattice services.
- Share the service(s) with the Apollo AWS Organization.
- Provide the service(s) routing information in your Apollo Organization configuration page.
This guide offers step-by-step instructions for each stage.
ⓘ NOTE
The AWS Console interface may differ slightly from the screenshots in this guide.
Step 1. Create AWS VPC Lattice target groups
A Lattice target group is a collection of targets, or compute resources, that run your application or service. You must set these up so your Lattice services can route requests accurately. Check out the AWS documentation to learn more.
- In the AWS Console for your region of choice, go to the VPC service page:
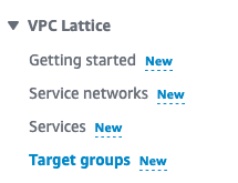
In the menu on the left, scroll down and open Target groups in the VPC Lattice section.
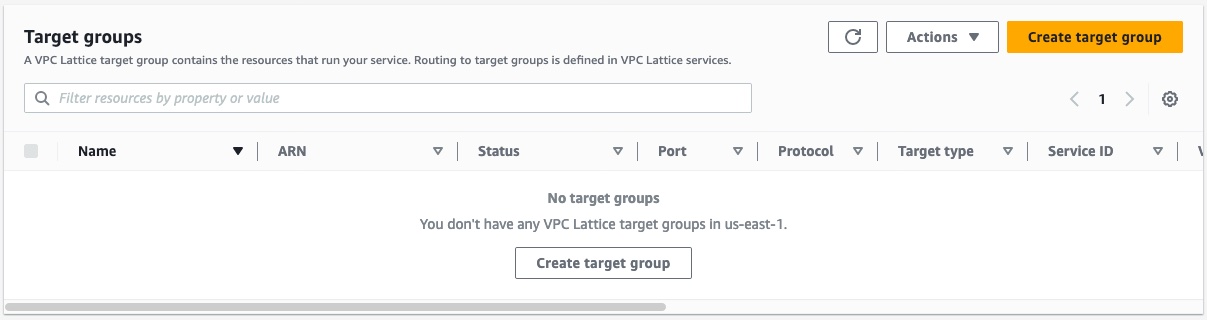
Click Create target group on the top right.
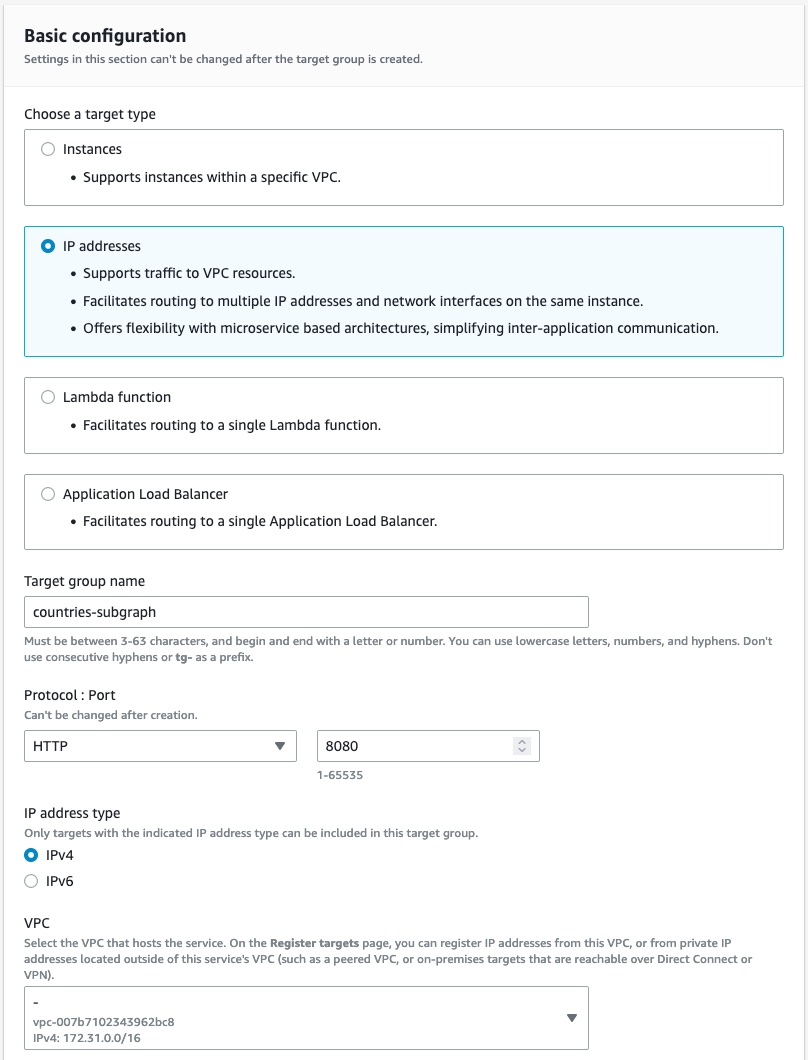
In the Basic configuration section, set the properties that match your subgraph resources.
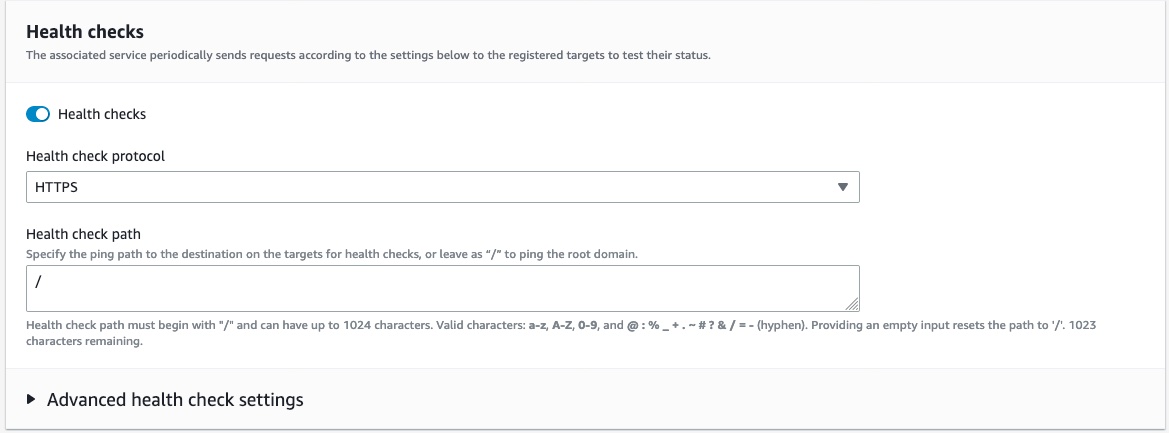
(Optional) If you use a target type with health checks, ensure you configure your health checks correctly, or Lattice will not be able to send traffic to your subgraphs.
Register the targets based on your chosen target type.
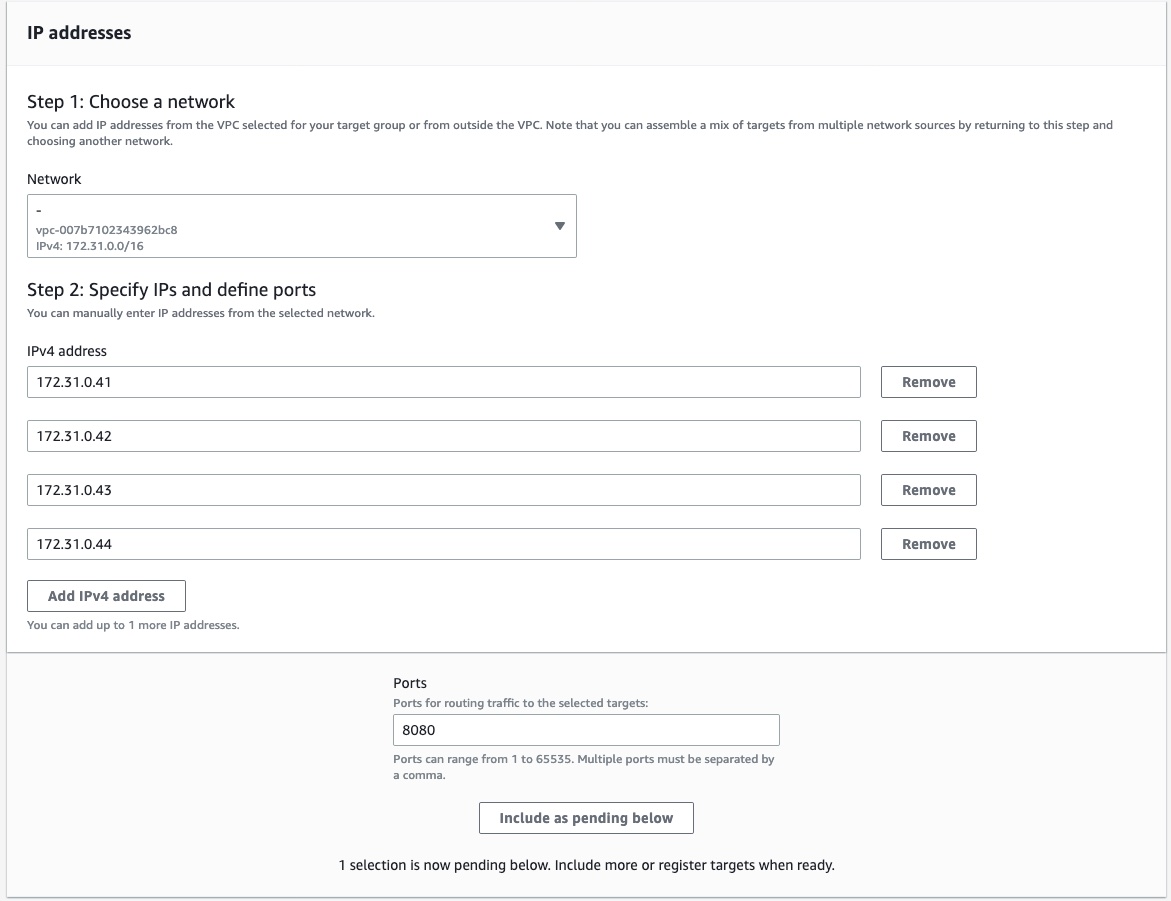
Review your targets to make sure all information is correct.
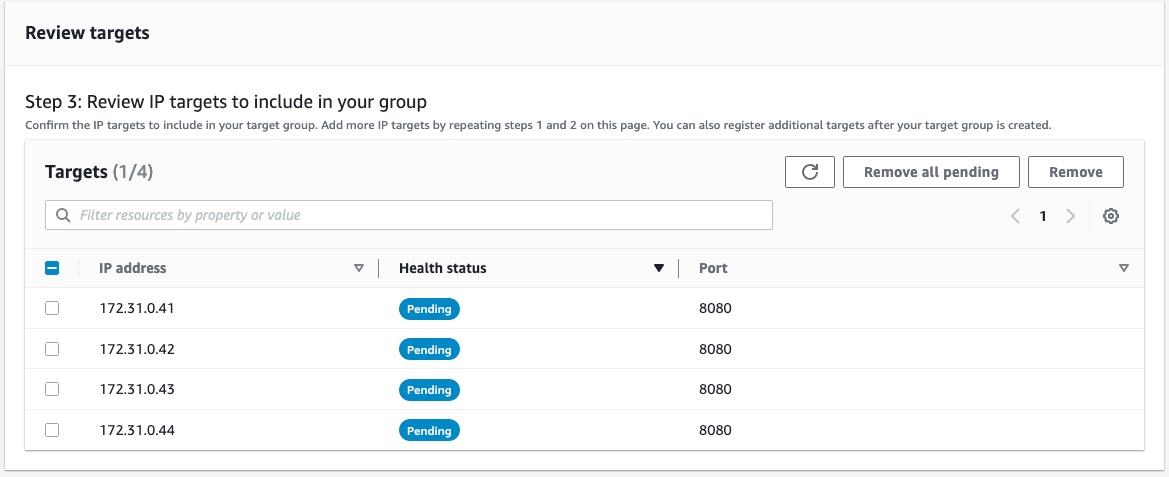
Click Create target group at the bottom right corner of the page.
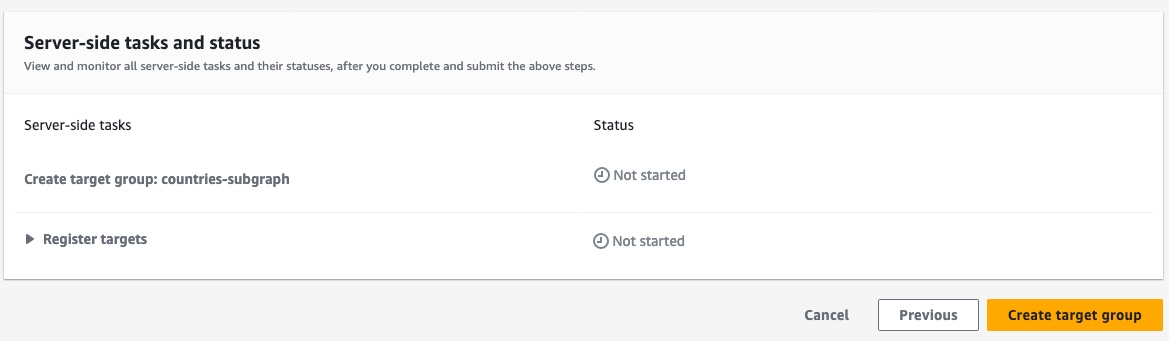
Congratulations! You've created an AWS VPC Lattice target group. Repeat this process for each resource you want to share with Cloud Dedicated.
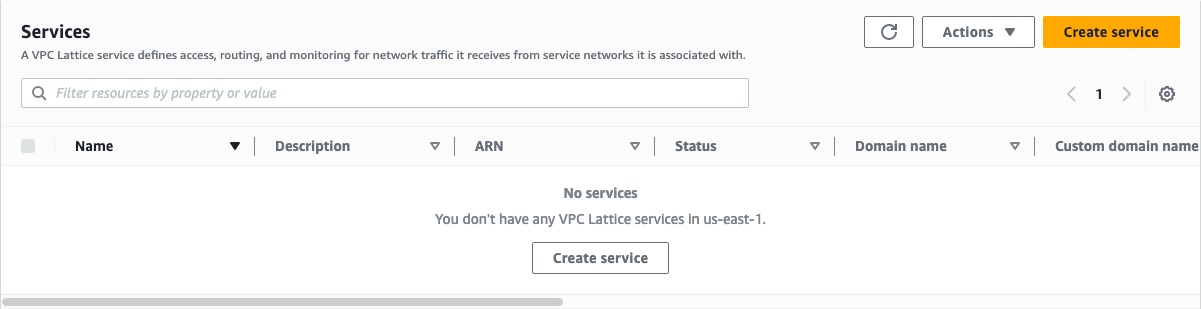
Step 2. Create an AWS VPC Lattice service
- In the AWS Console for your region, go to the VPC service page:
In the menu on the left, scroll down and open Services in the VPC Lattice section.
Click Create service in the top right.
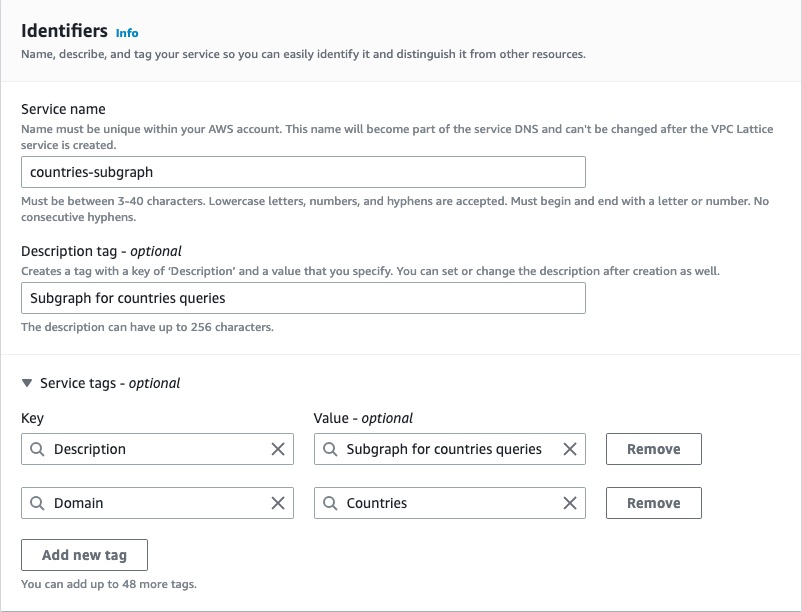
In the Identifiers section, give the name, description, and tags of your choice for the service.
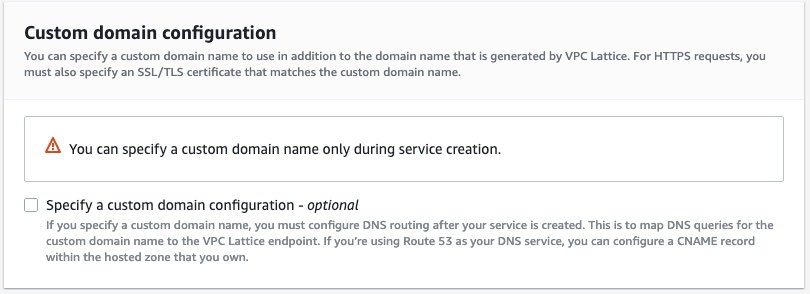
In the Custom domain configuration section, leave the Specify a custom domain configuration checkbox unselected.
In the Service access section, select the AWS IAM authentication type and paste the following authorization policy. This policy ensures that only the AWS Organization for Cloud Dedicated can send traffic to your subgraphs.
{"Version": "2012-10-17","Statement": [{"Effect": "Allow","Principal": "*","Action": "vpc-lattice-svcs:Invoke","Resource": "*","Condition": {"ForAnyValue:StringLike": {"aws:PrincipalOrgPaths": "o-9vaxczew6u/*/ou-leyb-l9pccq2t/ou-leyb-fvqz35yo/*"}}}]}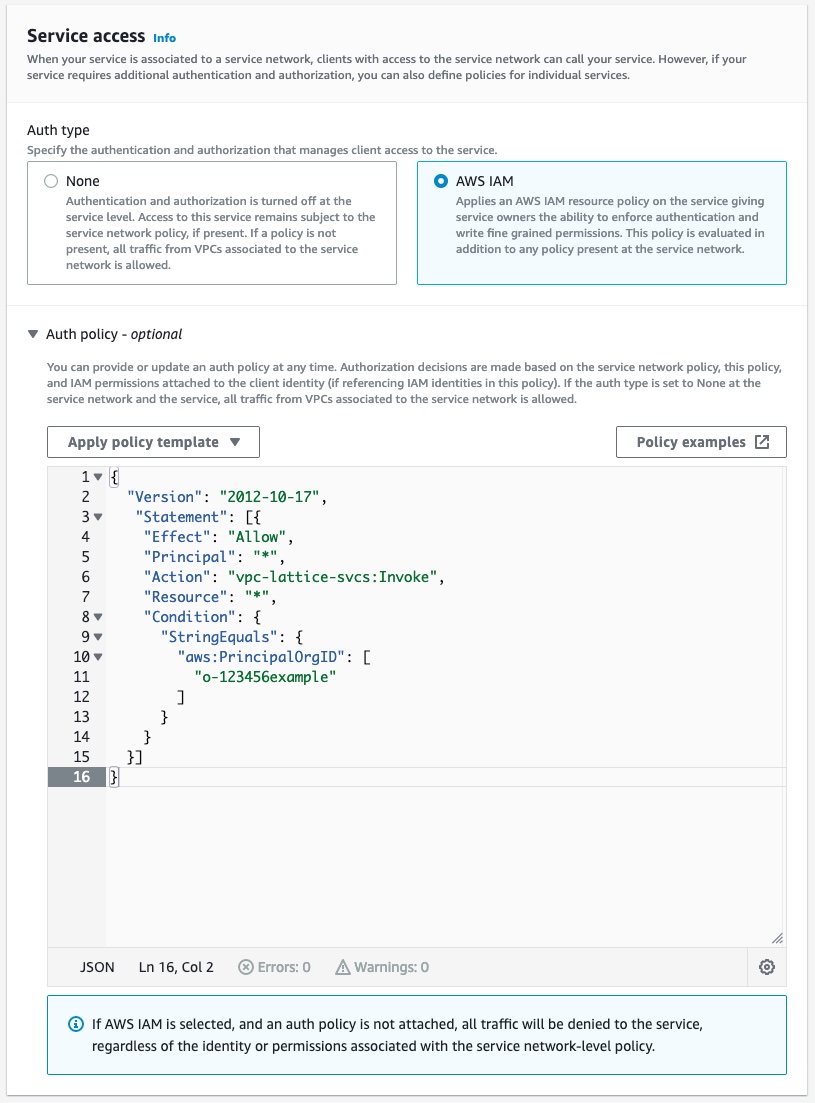
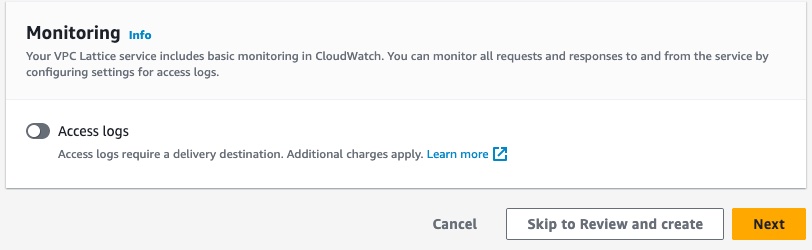
(Optional) For extra security, you can audit all the traffic coming to your subgraph by enabling access logs in the Monitoring section.
Once you've configured the service, click Next on the bottom right of the page.
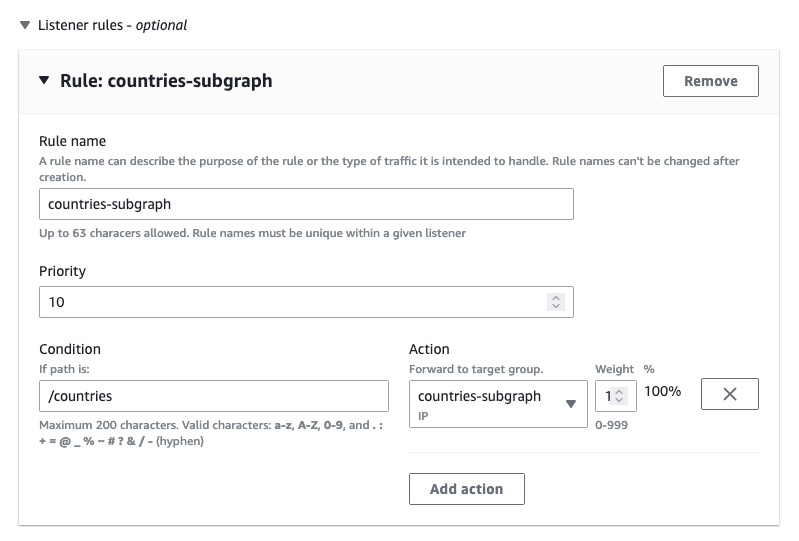
Define routing information to your target groups. Set the protocol to HTTPS and the port to 443.
ⓘ NOTE
For security reasons, we require you to use HTTPS for your listener. This enforces encryption in transit of the traffic between your GraphOS cloud router and your Lattice listener.
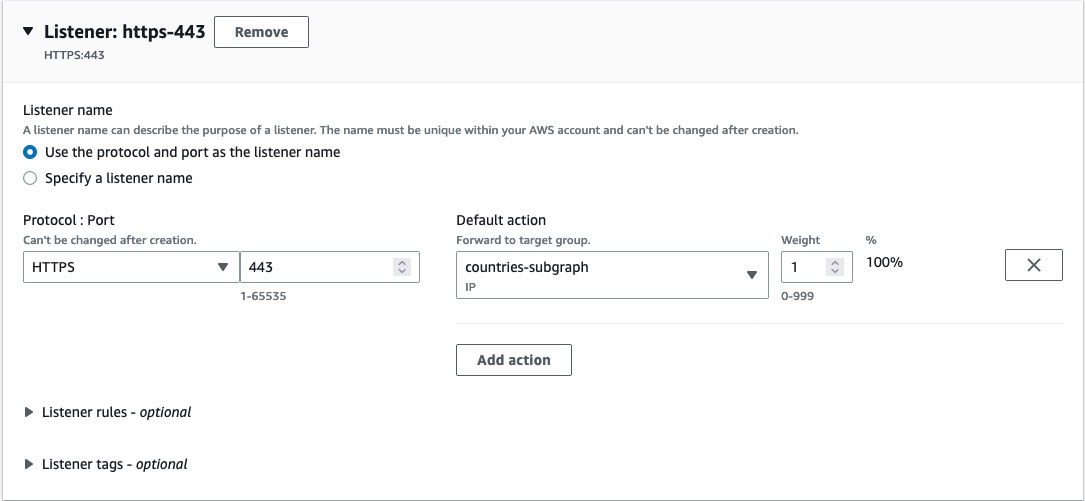
If you have multiple target groups, add a rule for each subgraph.
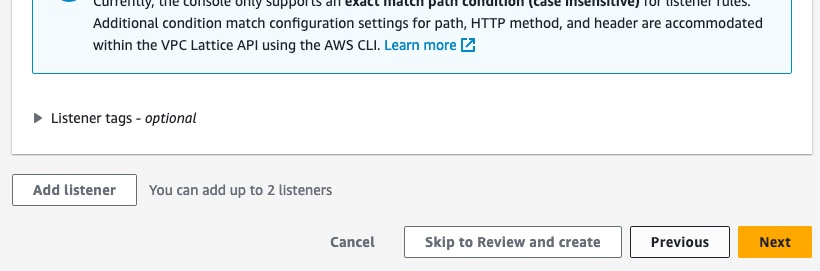
Click Next at the bottom right of the page once you've configured your listener.
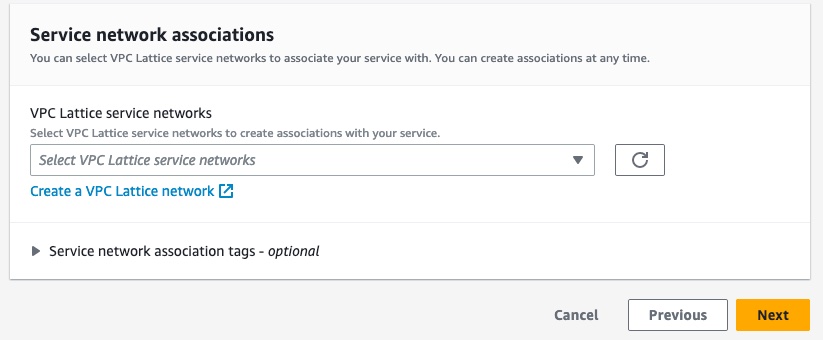
Do NOT select a VPC Lattice service network. Your subgraphs will integrate with a service network managed by Apollo. Instead, click the Next button at the bottom right of the page.
Ensure the information you've entered is correct, then click Create VPC Lattice service at the bottom right of the page.

Congratulations! You've now created a Lattice service for your subgraphs.
Step 3. Share the AWS VPC Lattice service with Cloud Dedicated
- In the AWS Console for your region of choice, go to the Resource Access Manager service page:
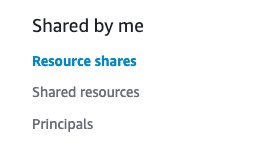
In the menu on the left, click Resource shares in the Shared by me section.
Click Create resource share in the top right corner.

In the Resource share name section, enter a name for your resource share.

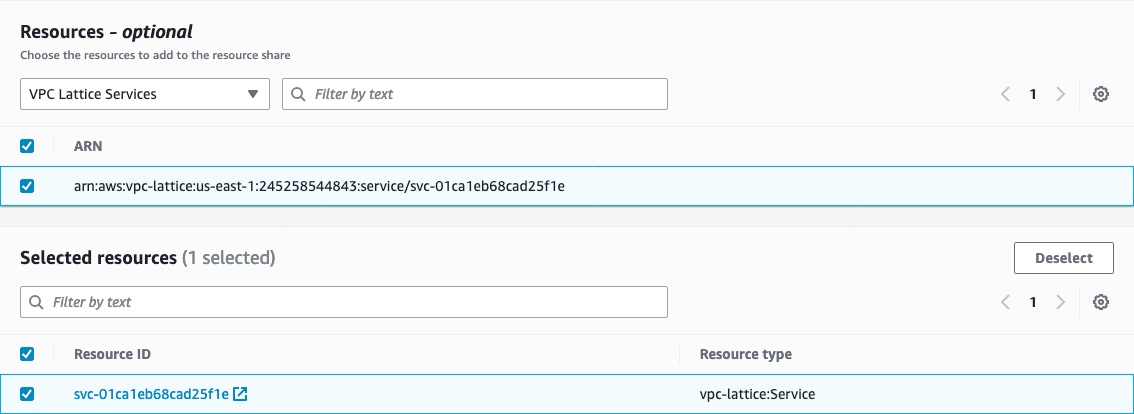
In the Resources section, select the resource type VPC Lattice Services.
Select all the Lattice services that contain your subgraphs.
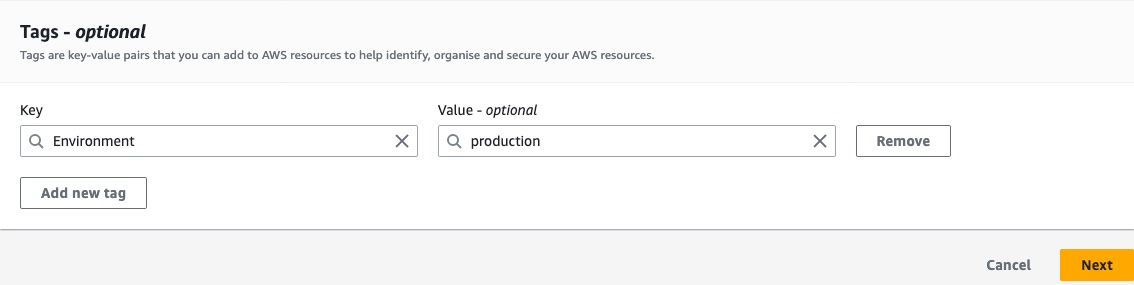
(Optional) Set tags for your resource share.

Click the Next button at the bottom right corner of the page.
Verify that the managed permissions give access to associate the Lattice services with a service network (
vpc-lattice:CreateServiceNetworkServiceAssociation and vpc-lattice:GetService). Then click the Next button at the bottom right of the page.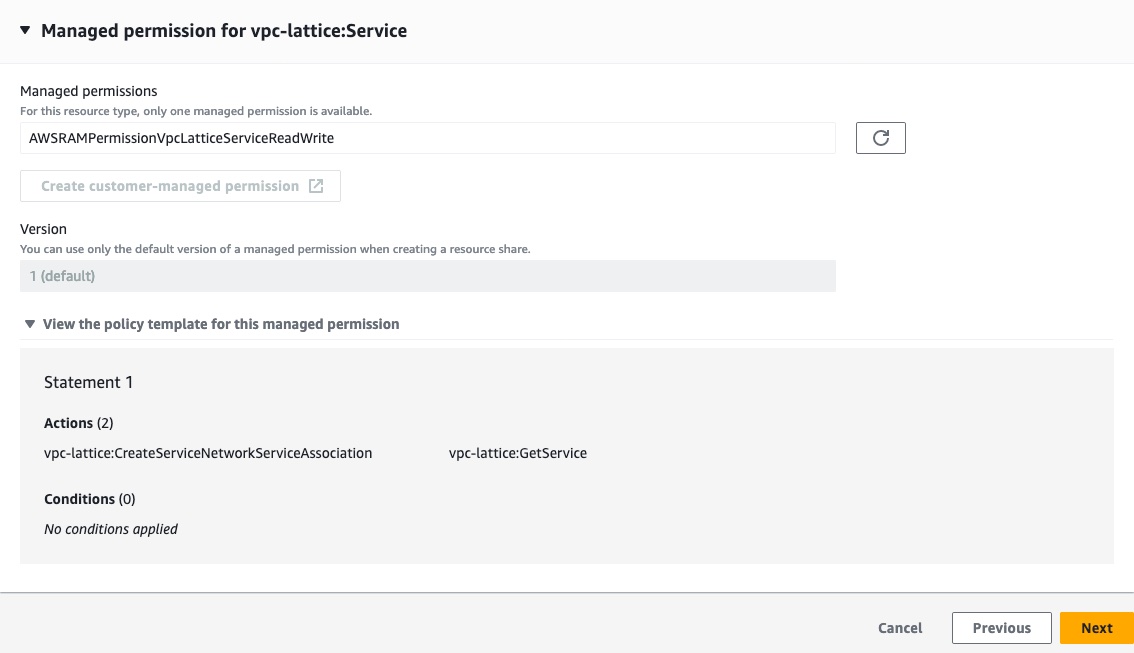
In the Principals section, select Allow sharing with anyone with a principal type of AWS account, enter the following value for the account ID:
282421723282, then click the Add button.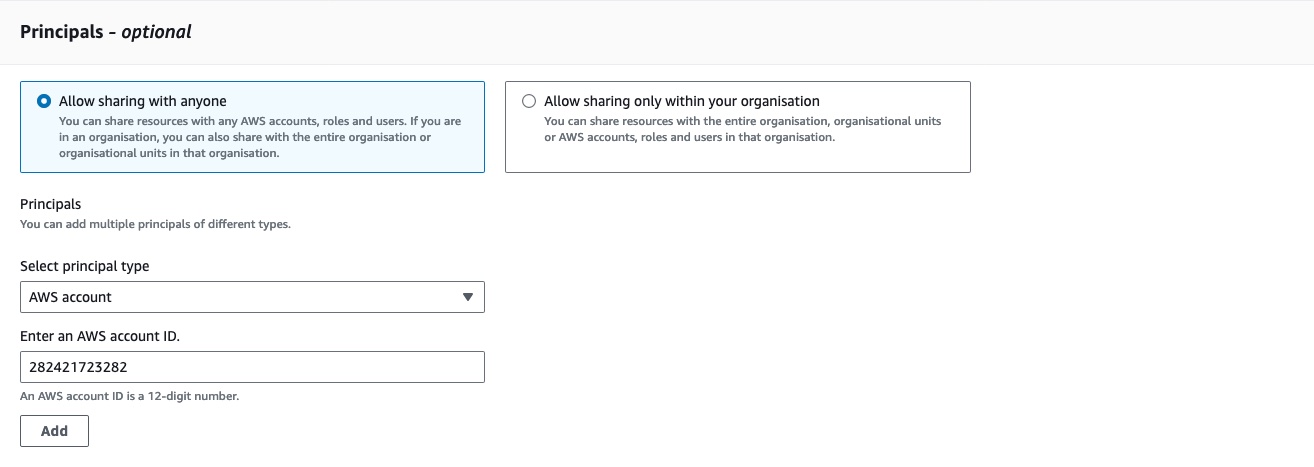
Confirm that
282421723282is the only selected principal for this resource share, then click the Next button on the bottom right corner.
Confirm that all the information is correct, then click Create resource share at the bottom right of the page.

Congratulations! You've now shared your Lattice services with Cloud Dedicated.
The last step is associating your resource share with the Apollo Organization account.
ⓘ NOTE
- You have 12 hours to associate your resource share—otherwise, AWS Resource Access Manager will fail to process the invitation, and you will have to restart this step.
- For security purposes, we recommend you continue to the next step immediately after creating the resource share. If you see that the resource share was Accepted or Failed in the AWS console and you did not follow step 4 of this guide, follow the steps to remove access to private subgraphs and restart this step.
Step 4. Associate your resource share with your Apollo Organization
- In the AWS Console for your region of choice, go to the Resource Access Manager service page:
In the menu on the left, click Resource shares in the Shared by me section.
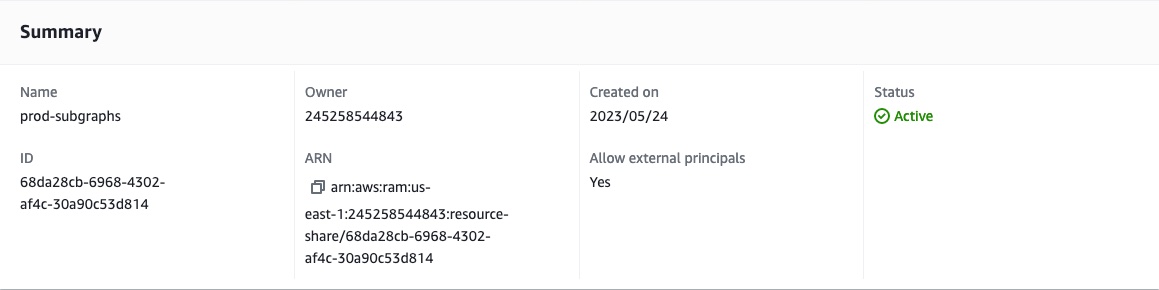
Click the resource share you created in the previous step.

Copy the ARN for the resource share.
Setup from this point differs based on whether this is your first private subgraph or if you're adding this service to an existing graph.
Setup for new private subgraphs
Go to GraphOS Studio.
Click the Create New Graph tab at the top right of the screen.
Follow Studio's onboarding steps to create a graph with a new private subgraph.
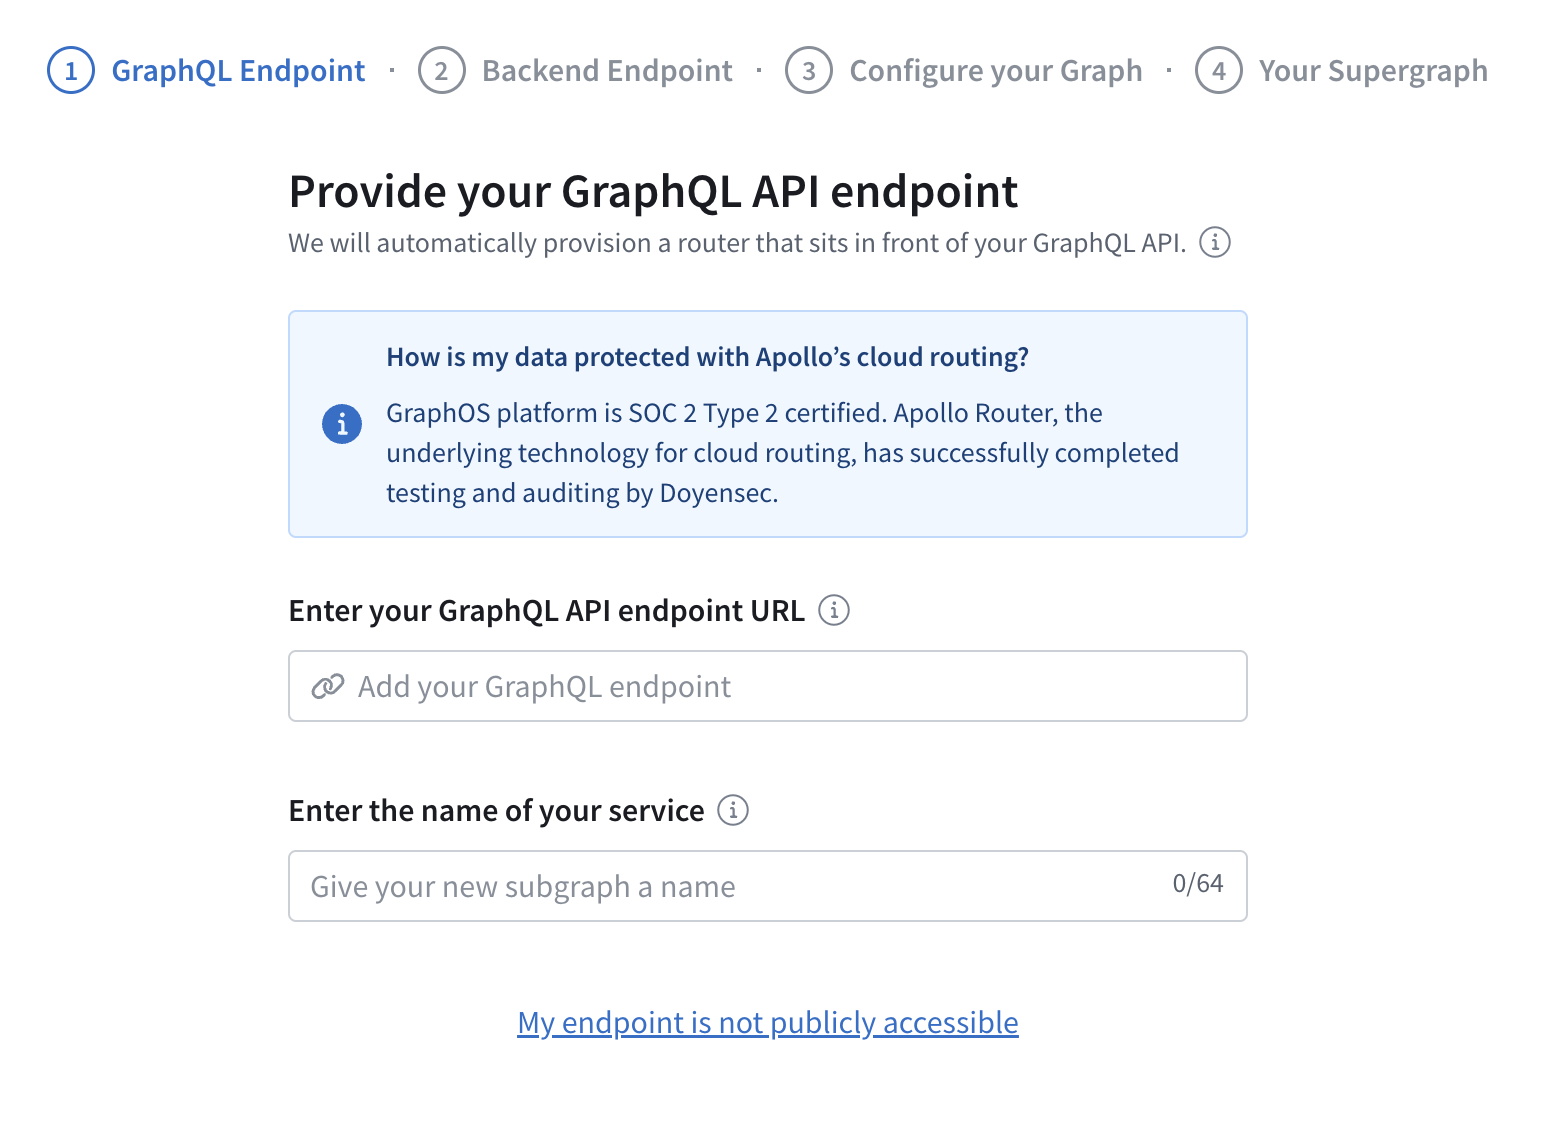
When prompted to Provide your GraphQL API endpoint, select My endpoint is not directly accessible at the bottom of the page.
Choose the backend provider you want to use for your private subgraph and the region where your subgraph should be provisioned.
ⓘ NOTE
All private subgraphs connected to a GraphOS cloud router must be in the same region.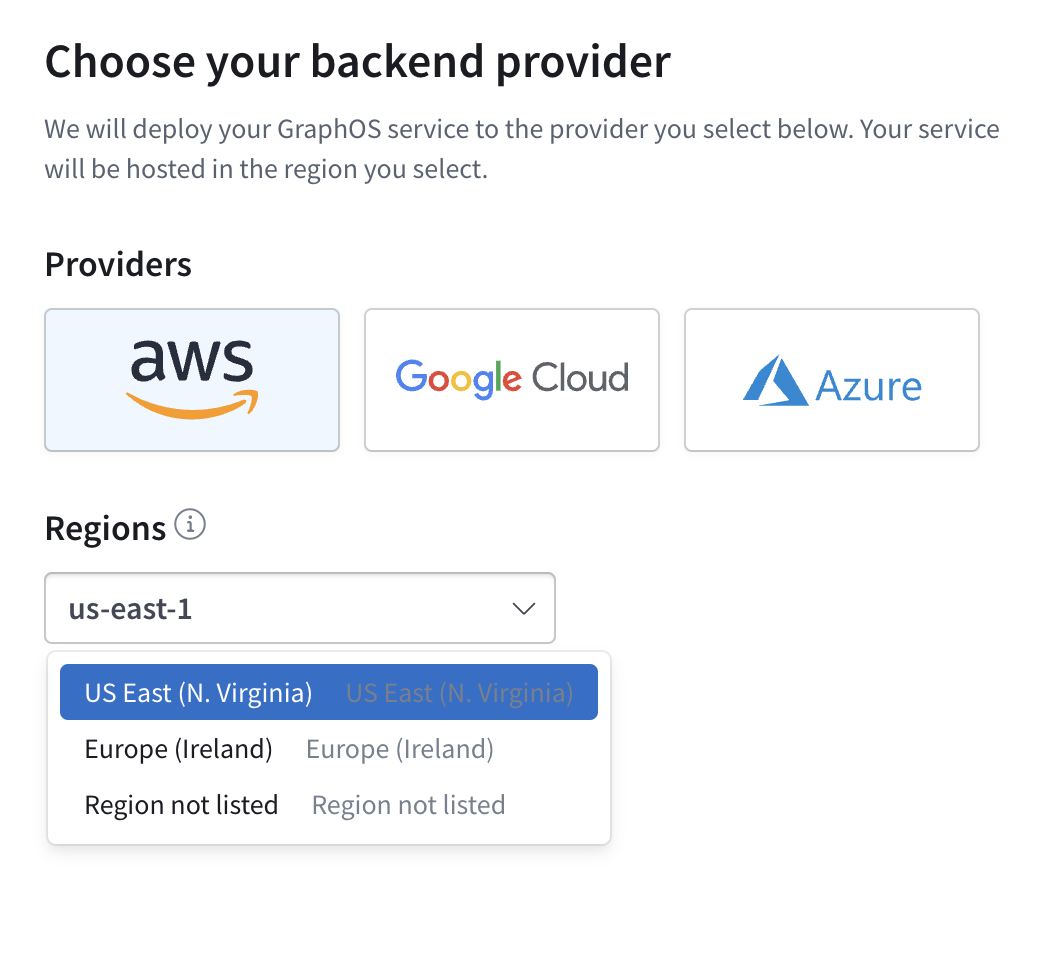
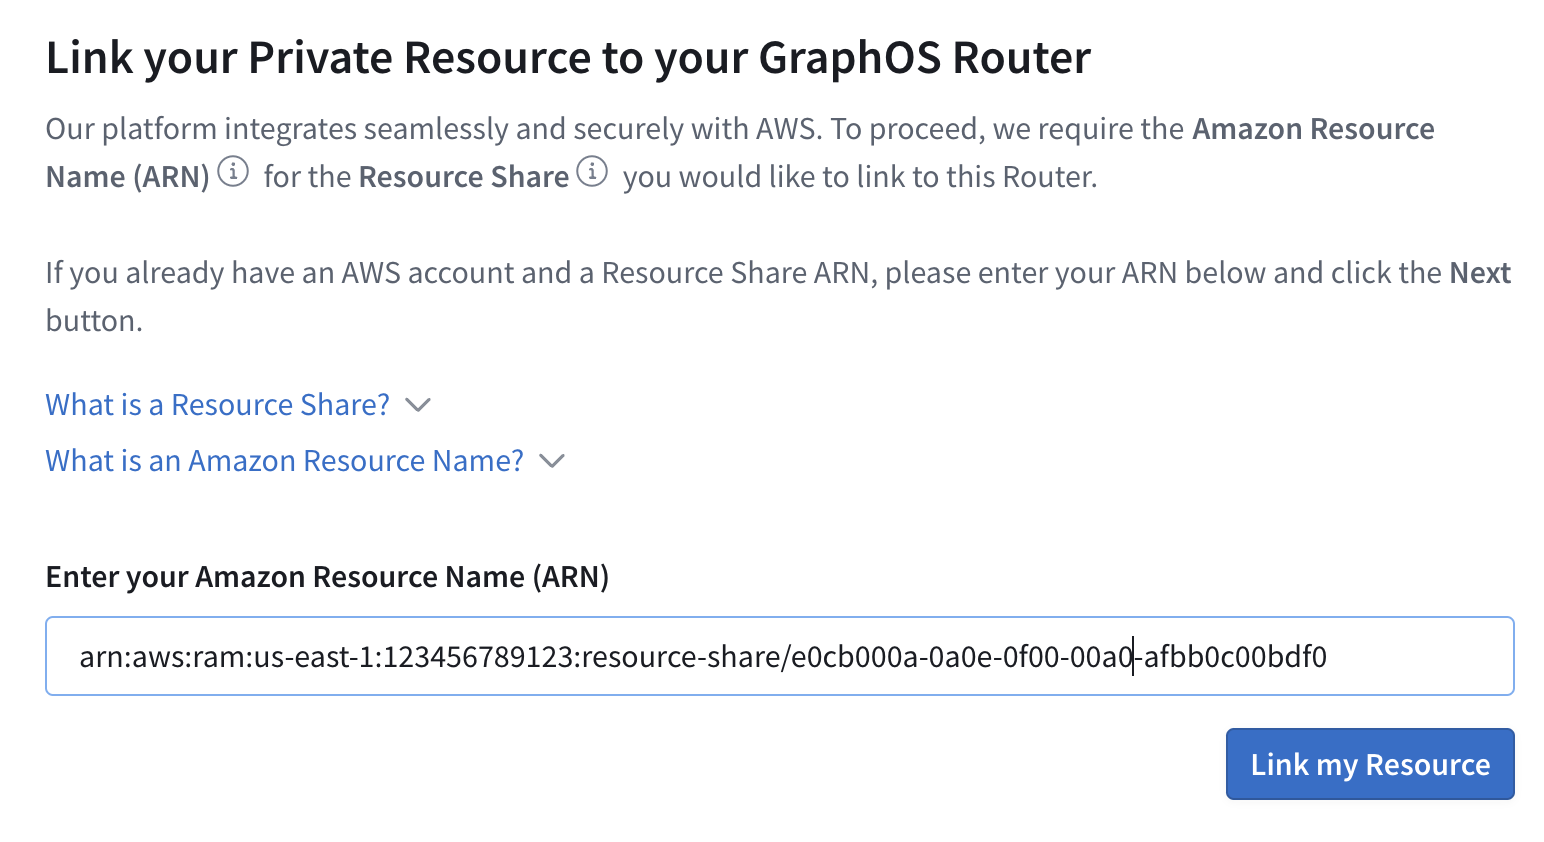
Paste the ARN of the resource share you created and copied from your AWS Console, then click Link my Resource and Next to continue.
From the dropdown menu, select the Lattice service that you would like to connect to your GraphOS Router. A default path of
/api/graphqlis automatically added to the URL. You can change this path if you want to.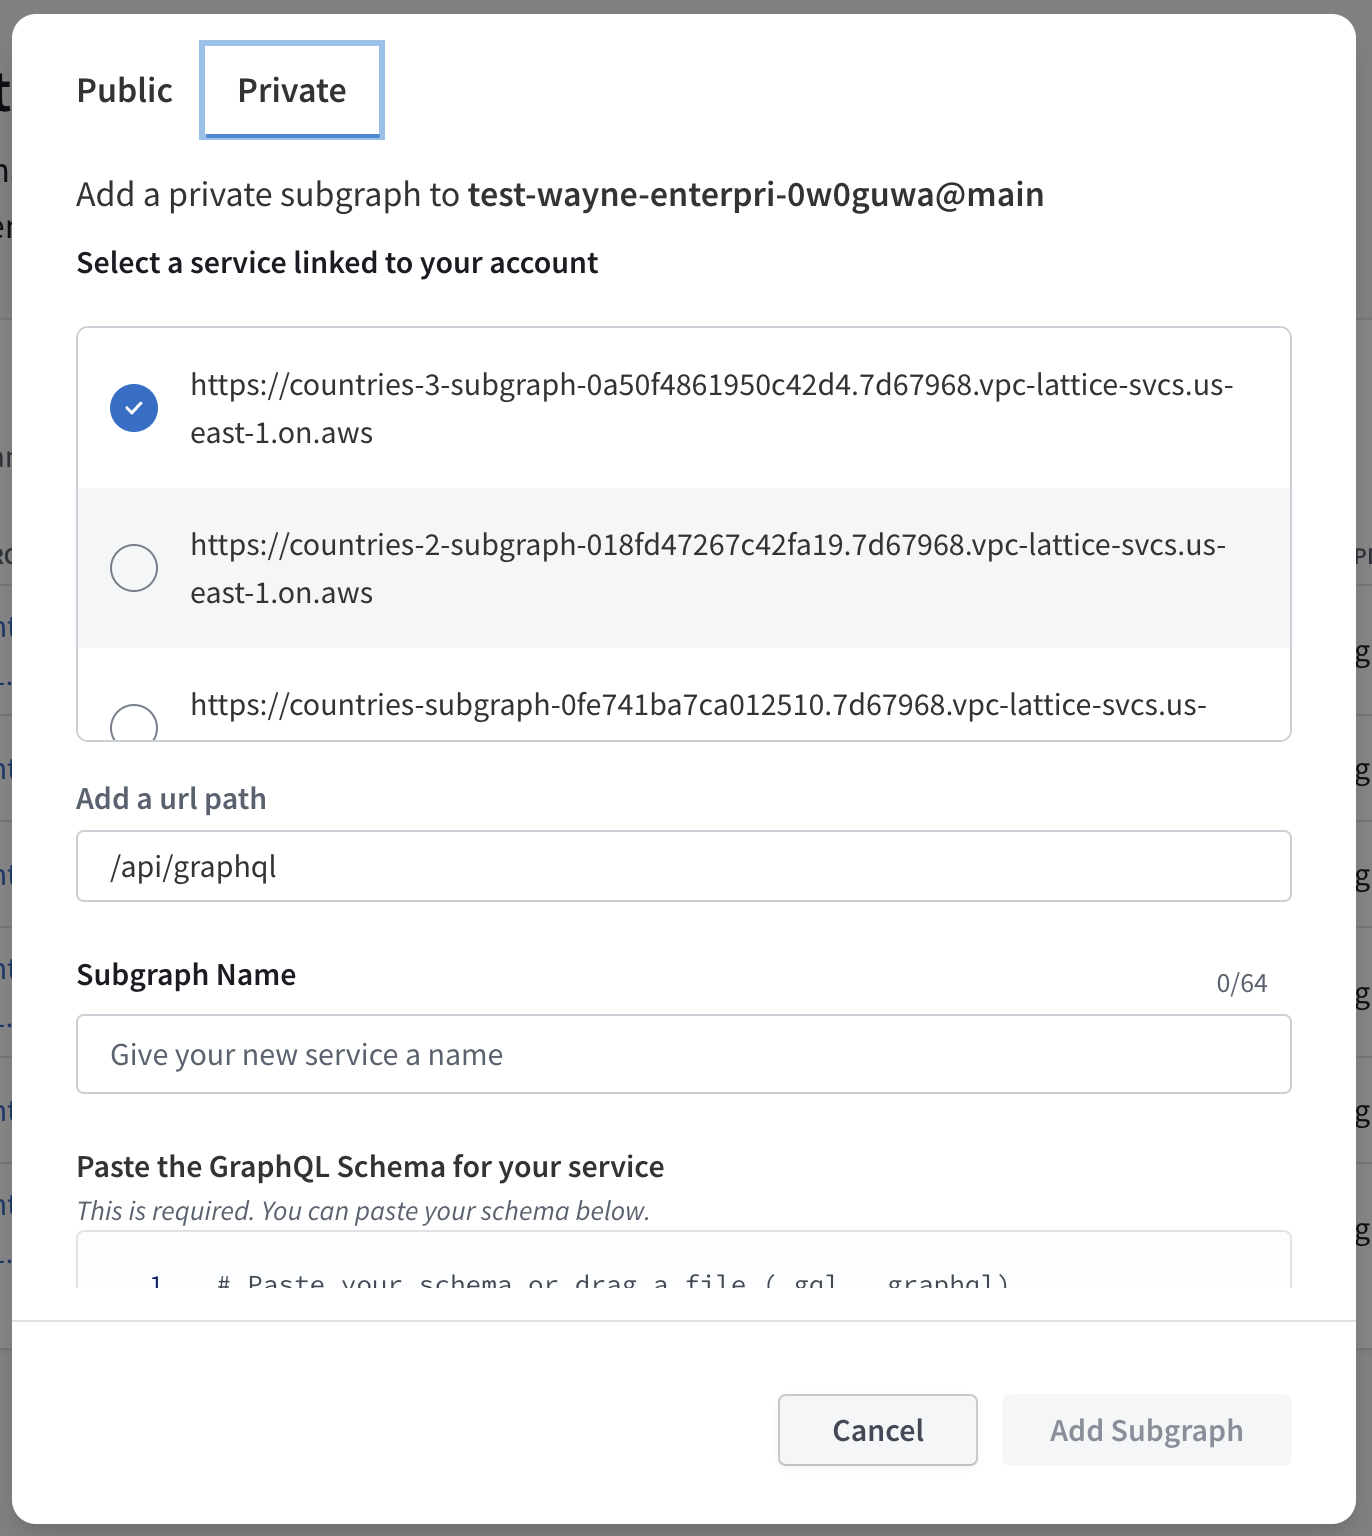
Add a Service Name to describe your Lattice service. This name will be used to identify your Lattice service in GraphOS Studio.

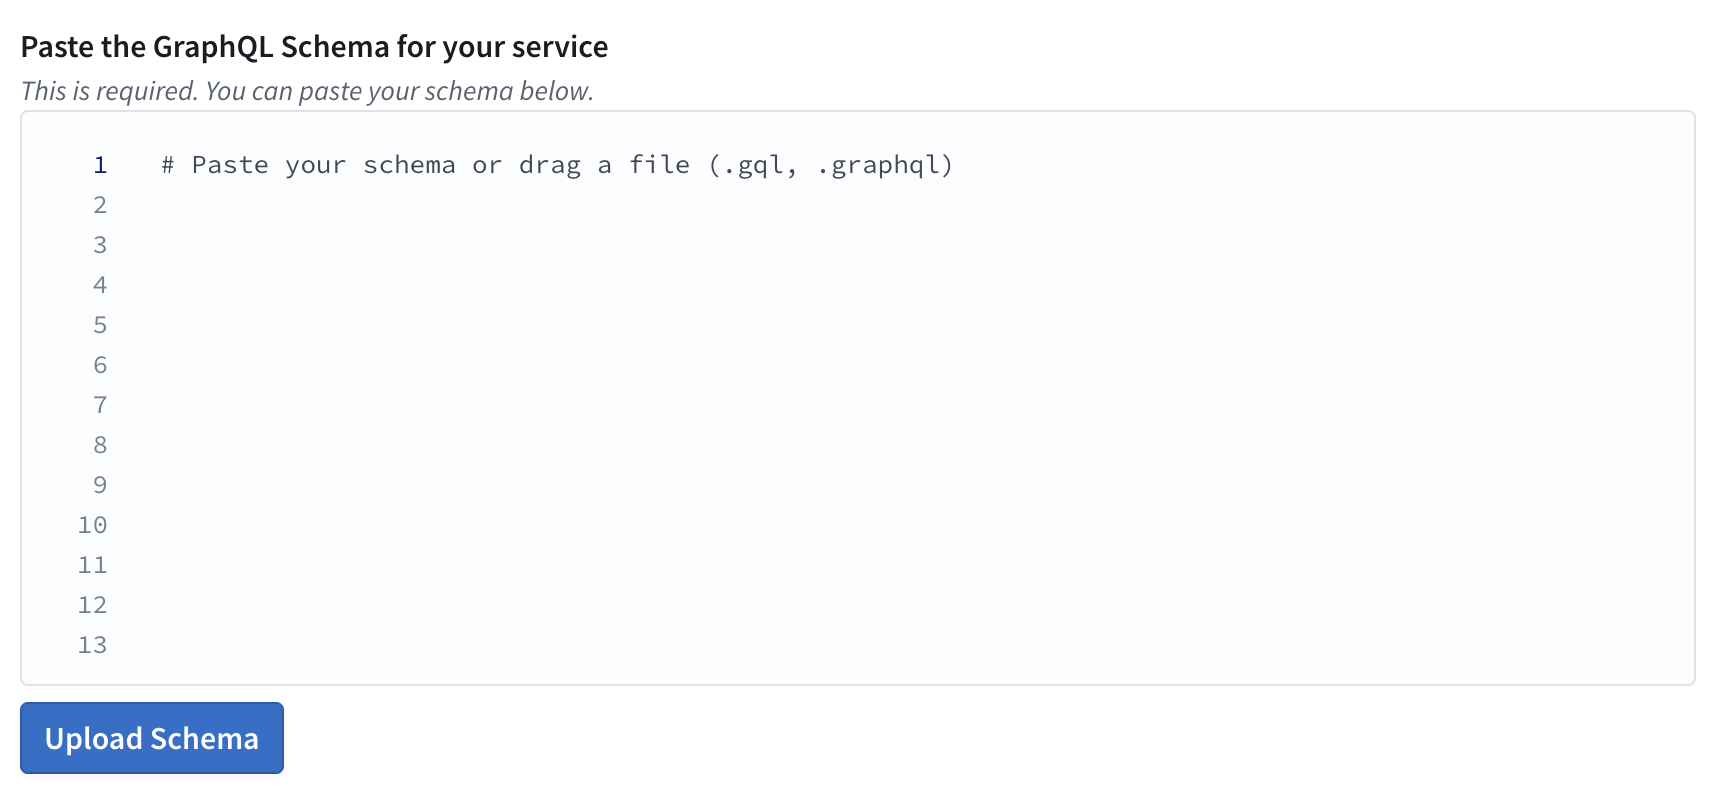
Paste the GraphQL schema for this subgraph in the Schema field. You can also upload a schema file by clicking the Upload Schema button.
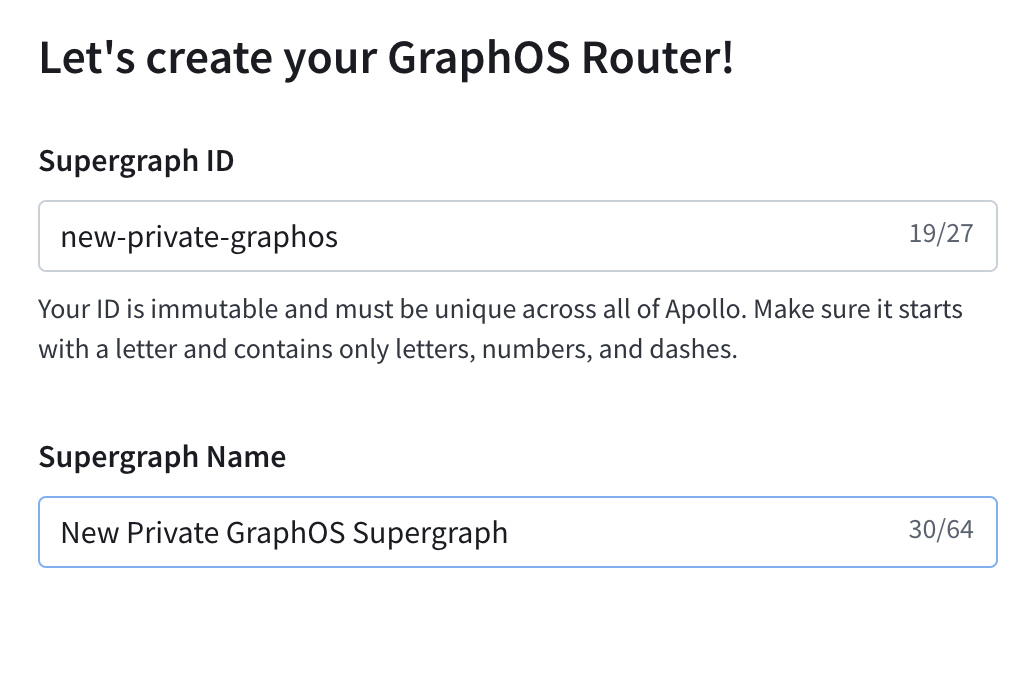
Update the ID and the name of the supergraph that you want to add this private subgraph to. An ID and name are automatically generated based on your organization's name, but you can change both as needed.
To finish, click Create GraphOS Router.

Congratulations! You've now created a GraphOS cloud router with a private subgraph.
Setup for existing graphs
Go to the graph you want to connect in GraphOS Studio.
From the left sidebar, open the Subgraphs tab of your graph.
Click Add a Subgraph on the right of the page.

In the modal, select the Private option, then select the AWS service you want to add from the dropdown menu. A default path of
/api/graphqlis automatically added to the URL. You can change this path if you like.Add a Service Name to describe your Lattice service. This name will be used to identify your Lattice service in GraphOS Studio.
Paste the GraphQL schema for this subgraph in the Schema field. You can also upload a schema file by clicking the Upload Schema button.
- To finish, click Add Subgraph.
Congratulations! You've now added a private subgraph to your GraphOS cloud router.
Further restrict access to private subgraphs
Once you configure an AWS VPC Lattice service to accept traffic from the Apollo AWS Organization, it is protected by multiple security layers:
- The AWS VPC Lattice service network only allows traffic with a valid signature and over HTTPS.
- The Lattice service's configured authorization policy ensures traffic only comes from Apollo's AWS accounts. (This is the authorization policy you configured in step 6 when creating your Lattice service.)
- Apollo cloud router provisioning compares subgraphs in a supergraph's configuration against the list of known private subgraphs in its Apollo account. It refuses to create or update cloud routers with unknown private subgraphs.
- Cloud routers only have permission to invoke private subgraphs listed in their supergraph configuration.
You can further restrict access to your private subgraphs by configuring additional conditions in your service's authorization policy. Specifically, you can add conditions to restrict traffic based on your organization's Apollo account ID or your supergraph's graph ref.
Update Lattice service authorization policy
To update a Lattice service's authorization policy with additional restrictions, you first need the Apollo account ID and/or graph ref to which you want to restrict subgraph access.
Obtain account ID and graph ref
- Contact Apollo to obtain your account ID. Specify you would like the account ID needed to update your Lattice service's authorization policy.
ⓘ NOTE
The Apollo account ID you specify in your authorization policy is not the Apollo organization ID you can find in Apollo GraphOS Studio.
You can find your supergraph's graph ref in your Apollo account:
- Log in to GraphOS Studio.
- Click on a graph variant on the Graphs page. The graph ref will be at the top of the page—click it to copy.
If you want to provide subgraph access to multiple Apollo accounts or supergraphs, you can specify multiple account IDs and graph refs when updating your policy.
Update policy
If you are using the Apollo Terraform module, you can set the apollo_account_ids and apollo_graph_refs variables to update your authorization policy. Provide one or more Apollo account IDs or graph refs:
apollo_account_ids = ["my_account_id", "another_account_id"]apollo_graph_refs = ["my-graph@my-variant", "another-graph@my-variant"]
If you aren't using the Apollo Terraform module, follow these steps:
- In the AWS Console for your region of choice, go to the VPC service page:
In the menu on the left, scroll down and open Services in the VPC Lattice section.
Click the name of the Lattice service whose authorization policy you want to configure.

In the Service access section, update your authorization policy. You can use the following as an example—make sure to replace the account ID and graph ref with your own.
{"Version": "2012-10-17","Statement": [{"Effect": "Allow","Principal": "*","Action": "vpc-lattice-svcs:Invoke","Resource": "*","Condition": {"ForAnyValue:StringLike": {"aws:PrincipalOrgPaths": "o-9vaxczew6u/*/ou-leyb-l9pccq2t/ou-leyb-fvqz35yo/*"},// Restrict traffic based on Apollo account IDs or graphRefs"StringEquals": {"aws:PrincipalTag/Apollo:accountId": "my_account_id_xezf34","aws:PrincipalTag/Apollo:graphRef": "my-graph@my-variant"}}}]}
If there are multiple supergraphs which should have access to the subgraph, use a comma-separated string of graph refs for aws:PrincipalTag/Apollo:graphRef. For example:
"aws:PrincipalTag/Apollo:graphRef": "my-graph@my-variant, my-graph@another-variant, another-graph@another-variant"
Similarly, you can use a comma-separated string of account IDs for aws:PrincipalTag/Apollo:accountId:
"aws:PrincipalTag/Apollo:accountId": "my_account_id_xezf34, "my_account_id_dehs56"
Remove access to private subgraphs
To remove Cloud Dedicated access to private subgraphs, you need to remove both resource shares and service network associations. Keep in mind that any existing supergraph that sends traffic to your private subgraphs will stop working once you remove access.
Remove resource shares
- In the AWS Console for your region of choice, go to the Resource Access Manager service page:
In the menu on the left, click Resource shares in the Shared by me section.
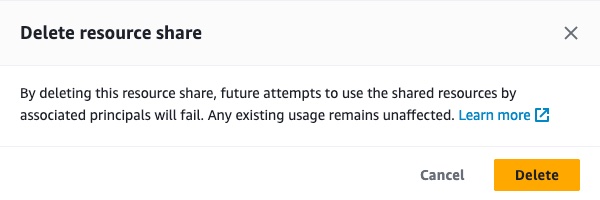
Select the resource share(s) associated with Cloud Dedicated and click the Delete button in the top right corner.
Click Delete in the popup modal.
Remove service network associations
- In the AWS Console for your region of choice, go to the VPC service page:
In the menu on the left, scroll down and open Services in the VPC Lattice section.
Click the name of the Lattice service you want to disconnect.
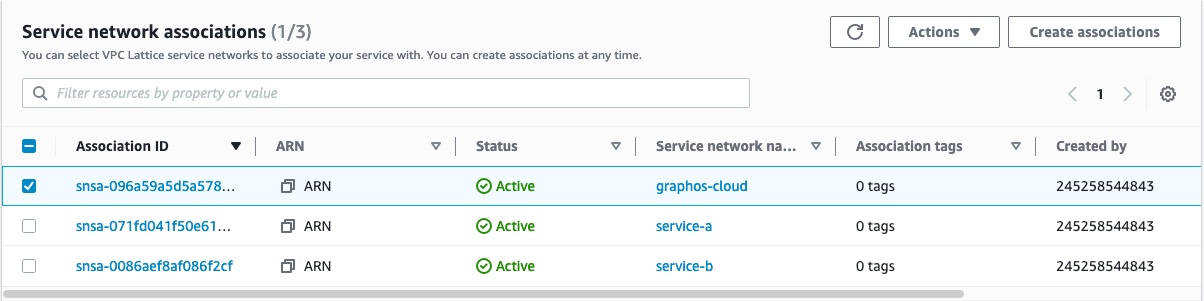
In the Service network associations, select the graphos-cloud service name.
Click the Actions button in the top right of that section, and click Delete network associations.
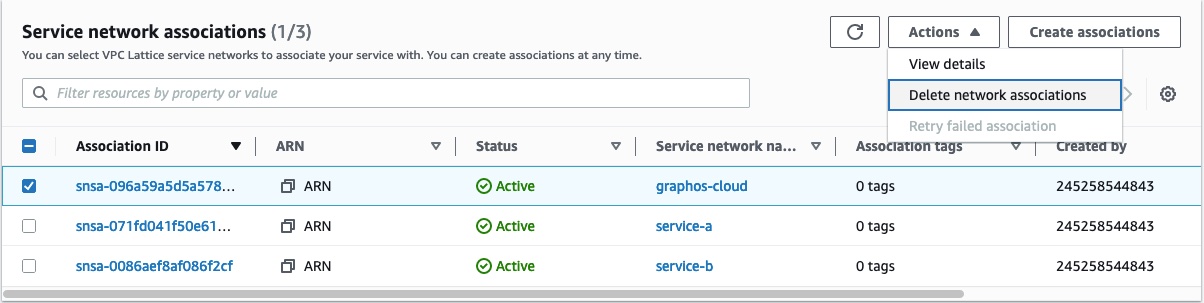
Follow the confirmation instructions and click Delete.
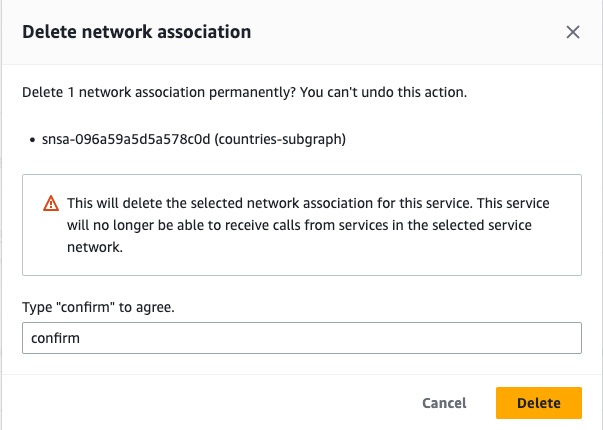
Deleting the network association can take a few seconds. Once the network association is deleted, Cloud Dedicated cannot contact your subgraphs anymore.
AWS VPC Lattice monitoring
To validate that traffic is flowing to your private subgraphs, you can leverage the metrics and access logs emitted by AWS VPC Lattice:
In the AWS Console for your region of choice, go to the VPC service page.
In the menu on the left, scroll down and open Services in the VPC Lattice section.
Click on the name of the Lattice service leveraged by the subgraph in question.

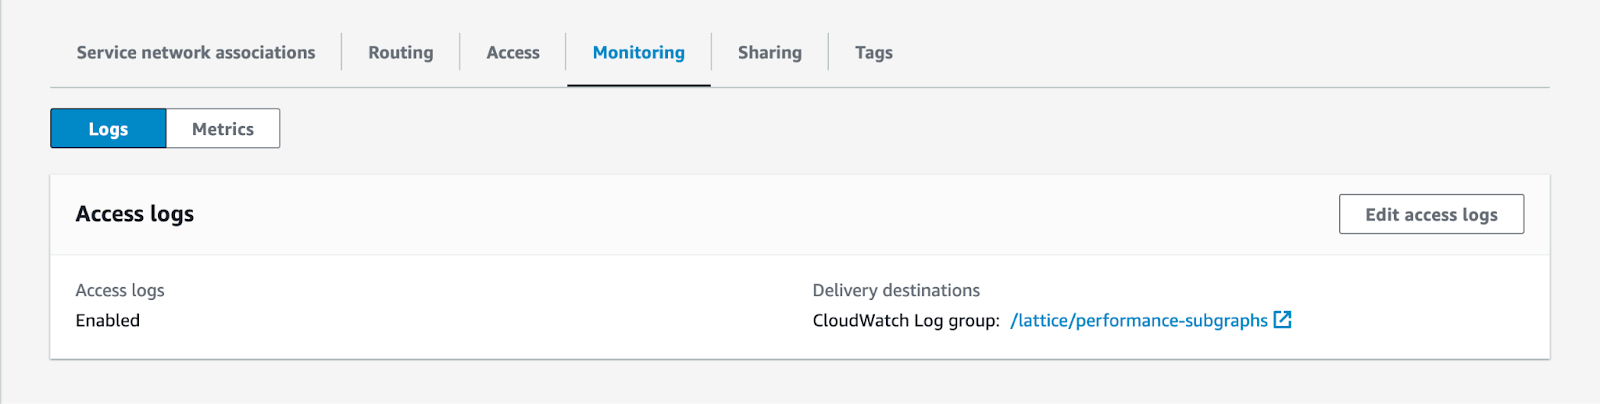
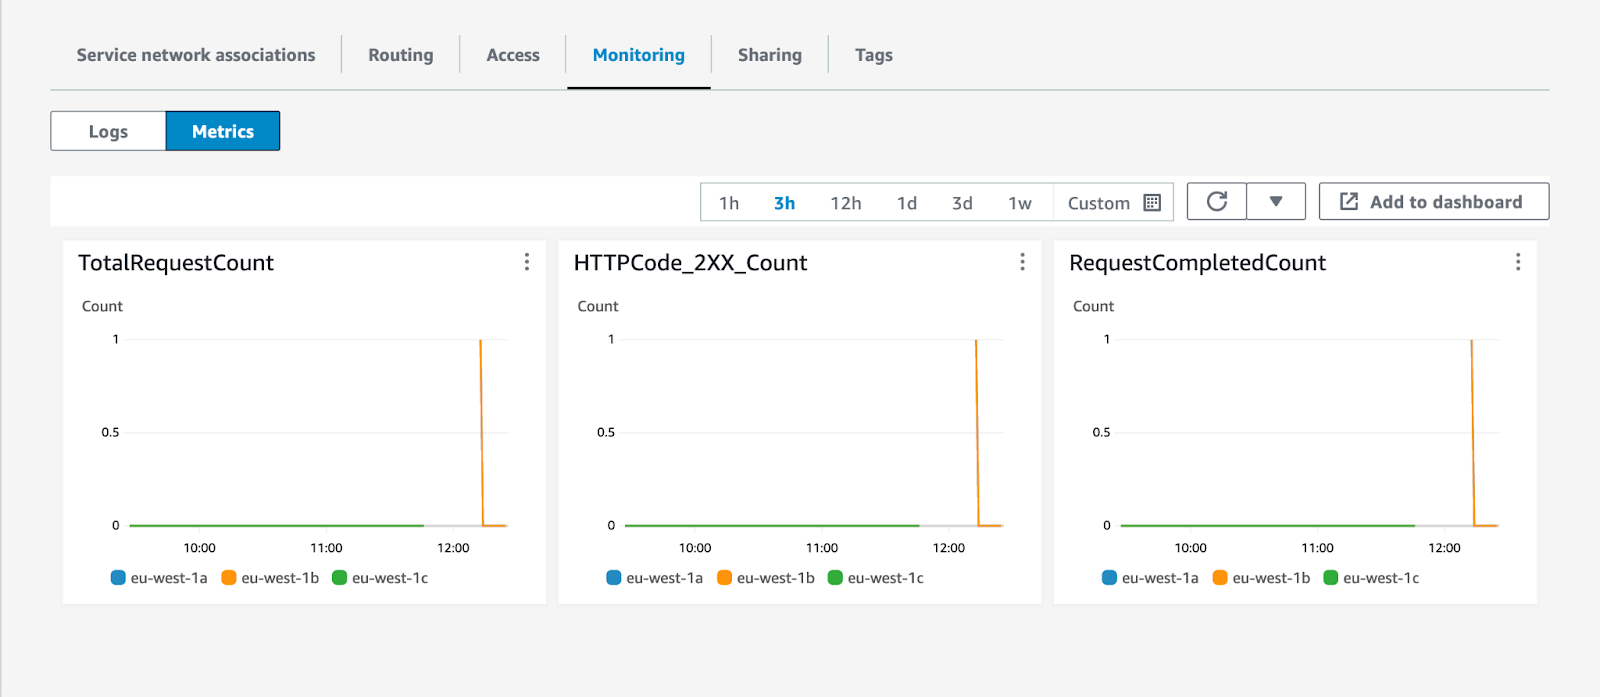
Click on the Monitoring tab.
From there, you can configure and enable access logs for your AWS VPC Lattice service. You can also navigate to the Metrics tab to get a quick overview if traffic is flowing to your private subgraphs.
You can also leverage Amazon CloudWatch metrics emitted by AWS VPC Lattice to set up dashboards and alarms to understand the health of your private subgraphs.
Frequently asked questions
How does Cloud Dedicated prevent other users from accessing my private subgraphs?
When you associate a resource share for the first time, Cloud Dedicated will scan the Lattice services contained in the resource share to retrieve their ARNs and domain names.
When you add a private subgraph to one of your supergraphs, Cloud Dedicated will check that the domain for that subgraph matches one of the Lattice services you have associated with your Apollo Organization.
As a second line of defense, supergraphs use AWS IAM permissions and SigV4 to only allow traffic to the subgraphs in the same Apollo organization.
I want to use AWS VPC Lattice within my own organization. Can I still use Lattice for private subgraphs?
Yes. Cloud Dedicated will associate your Lattice services with its own service network, and you can associate a Lattice service with multiple service networks. You can also create multiple Lattice target groups or Lattice services for the same load balancer, IP addresses, Lambda functions, or other resources supported by Lattice target groups.
Tips and troubleshooting
See the troubleshooting guide for tips and common errors.